Posts: 496
Threads: 22
Joined: Dec 2008
Spitfire Wrote:Personally I would use putty to fill the cracks cuz i'm lazy!! 
I'd like to hear how you would go about using putty to fill in the gaps on something like my windows. I may just be too clumsy fingered, but I know I would have a hard time applying it without getting it all over the edge of the brickwork, removing paint in the process. Hence my thought of using a syringe type applicator. And the putties I've used seem to "solid" to use this way. However I won't be surprised if you have a trick up your sleeve!
Too bad about the passport issue, timing is everything! Although it would be cool if what Wayne said is correct. Want to give it a try?
e-paw Wrote:Sounds good to me, See you on Saturday Looking forward to it! I've started to build a pair of transformers based on your model. I ordinarily don't like to model from another model (potentially copying errors) but I could not find photos of 1950 era transformers and commercially available ones are too modern. Plus, you were modelling ones you have worked with!
Gary
Posts: 496
Threads: 22
Joined: Dec 2008
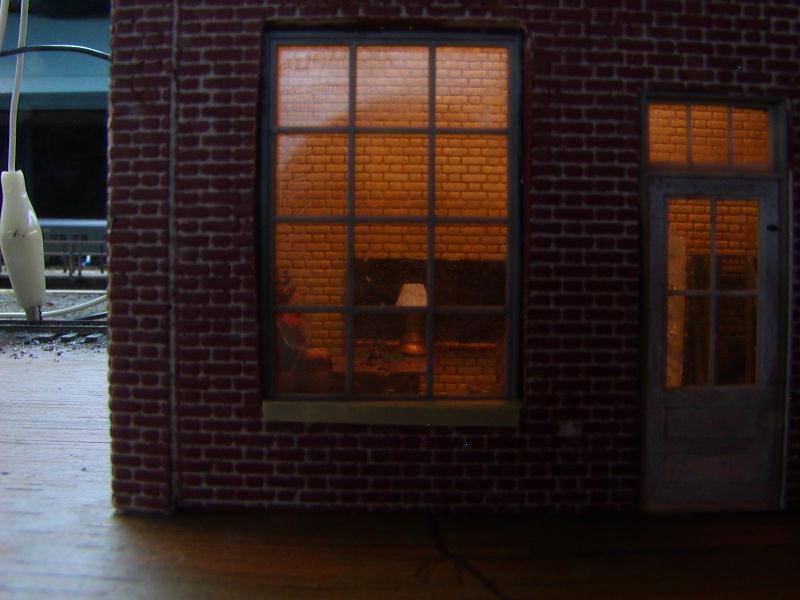
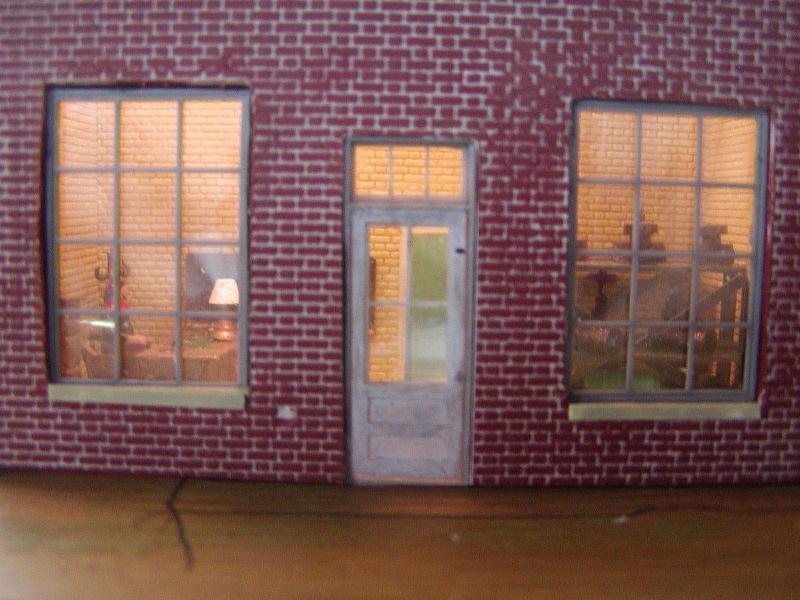
I managed to pop out the windows and then painted the mounting flange balck as I mentioned above. After reinstalling the windows I made the sills. Here is how it looks now. Light leak is fixed! Still have downspouts and electrical conduit to install, and need sills on windows on other walls, but nearing completion now.
Posts: 496
Threads: 22
Joined: Dec 2008
Posts: 496
Threads: 22
Joined: Dec 2008
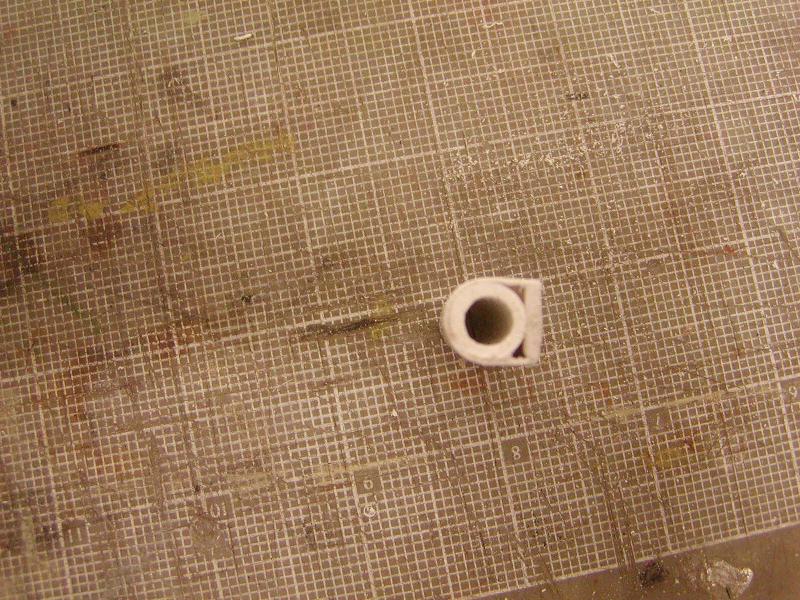
Thought I'd show how I made the housing for the rollup door. While there is nothing out of the ordinary, I thought there may be some who might benefit from seeing it. A piece of styrene strip the same width as the diameter of a styrene tube was glued to the tube, them .010 sheet was glued around it. Next step was to use more .010 sheet to cover the ends. After sanding smooth, it was painted and put on the bldg.
Posts: 2,724
Threads: 160
Joined: Dec 2008
That roll up door looks good, Just like the ones on the LNE round house near Wind gap.
My other car is a locomotive, ARHS restoration crew
Posts: 4,161
Threads: 174
Joined: Dec 2008
jglfan Wrote:Thought I'd show how I made the housing for the rollup door. While there is nothing out of the ordinary, I thought there may be some who might benefit from seeing it. A piece of styrene strip the same width as the diameter of a styrene tube was glued to the tube, them .010 sheet was glued around it. Next step was to use more .010 sheet to cover the ends. After sanding smooth, it was painted and put on the bldg.
I'm glad you did that! I made door housings on my enginehouse out of pieces of dowel stick but they really could look better like yous! 
Ralph
Posts: 496
Threads: 22
Joined: Dec 2008
Thanks Steve, Ralph. Sometimes I think something like that housing for the rollup door is too simple to post and people might snicker at it. A bit of an insecurity issue I suppose. But posts like it, and articles in the various mags, are how I learned to do things. A little tough to assume I can teach when I'm still a student!
Posts: 5,170
Threads: 100
Joined: Dec 2008
Nicely done Gary---having seen your layout in person,I can appreciate your workmanship when you post them here---please post some more shots 
Posts: 4,553
Threads: 100
Joined: Dec 2008
Gary, it's hard to tell from the picture, is the office lit by the lamp on the desk?, or from "overhead"? The lit office interior looks great!
I'll have to take a shot of the "cabin cruiser", in the dark to show the light "from the lamp". I'll post that once the camera batteries are recharged, and I've had a chance to shoot the picture.
I'm currently "up in an orbiting drydock", fitting out USS Kodiak NCC 6000, in 1:537 scale. It's been a fun build! (finescale.com, Sci-Fi, StarTrek group scratchbuild)
We always learn far more from our own mistakes, than we will ever learn from another's advice.
The greatest place to live life, is on the sharp leading edge of a learning curve.
Lead me not into temptation.....I can find it myself!
Posts: 496
Threads: 22
Joined: Dec 2008
Thanks Ed, Pete. Pete, the interior is lit from above. I'd love to see your shot of a cabin cruiser interior lit by a lamp!
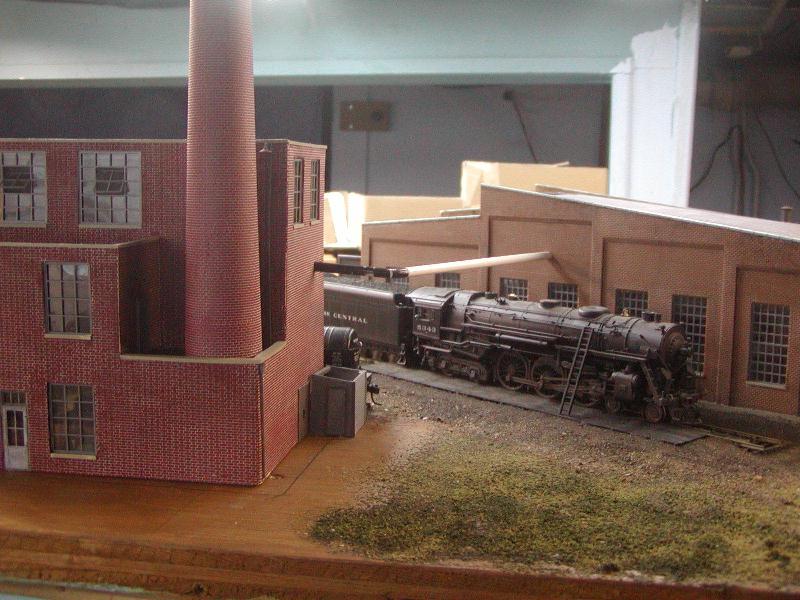
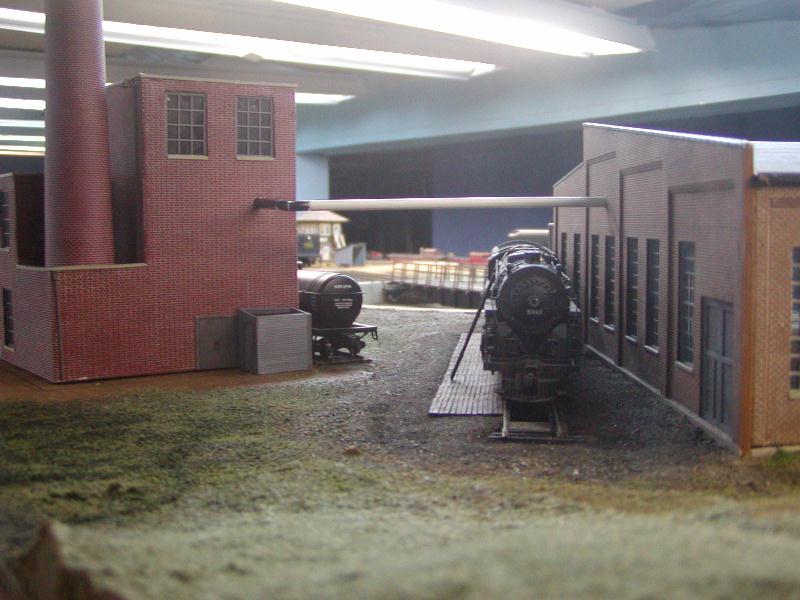
I have another question: I need to place supports for the steam pipe from the powerhouse to the roundhouse. I'm not sure on proper placement. Can I place one under the elbow and another between that one and the roundhouse? Or would they avoid placing one at the elbow and instead use two, one on either side? Here are a couple shots of this part of the scene so you know what I mean.
Posts: 2,959
Threads: 158
Joined: Dec 2008
I finally got a chance to browse through this entire thread. Very nice work, and this scene is coming along well. Some of the techniques you used for the bricks and windows may come in handy for my kitbash challenge structure. 
--
Kevin
Check out my Shapeways creations!
3-d printed items in HO/HOn3 and more!
<!-- m --><a class="postlink" href="https://www.shapeways.com/shops/kevin-s-model-train-detail-parts">https://www.shapeways.com/shops/kevin-s ... tail-parts</a><!-- m -->
Posts: 2,724
Threads: 160
Joined: Dec 2008
Gary, I don't think that it realy matters so much about your elbow placement. I've spent plenty of time working at Stepan Chemical in Maywood NJ. They have steam pipes running in all sorts of directions with all kinds of twists and turns in them. I say just do what looks right.
My other car is a locomotive, ARHS restoration crew
Posts: 2,458
Threads: 57
Joined: Dec 2008
I don't know "squat" about braces, supports, and such....But that steamer is just killing me..... 
Would love to see a "tour" of that baby.... 
Gus (LC&P).
Posts: 1,999
Threads: 98
Joined: Dec 2008
Like the guy closing the door. Nice detail.
Couldn't you make a "bridge", for that pipe.
Plastruct has structual shapes, that can be used for a carrier, and would really make a neat detail.
Here's what I'm talking about:
<!-- m --><a class="postlink" href="http://www.plastruct.com/pages/OnlineProductDetail.lasso?-op='eq'&CCode=OTS-16">http://www.plastruct.com/pages/OnlinePr ... ode=OTS-16</a><!-- m -->
Torrington, Ct.
NARA Member #87
I went to my Happy Place, but it was closed for renovations.
Posts: 5,859
Threads: 175
Joined: Dec 2008
Gary, in all likelihood, that pipe would be one of a fairly small diameter, lagged with formed asbestos, then covered with sheet metal. A single "A" frame support, located somewhere near the mid-point, should be sufficient, although you could also put another beneath the elbow if you think that it would improve the appearance. It seems to me that I've also seen such pipes supported by catenary, much like wire for overhead current collection.
Wayne
|


