Posts: 4,553
Threads: 100
Joined: Dec 2008
Sag Harbor Shipbuilding and DryDock Company, is building a larger articulated locomotive for its freight line. It probably will not see any service on the yard property, as the curves there are a bit too tight for the longer wheelbase. The 2-4-4-2 handles that duty, already.
This project has been sitting around for "almost a millennium", so I guess a "Get off your duff, and get it done" is an appropriate reason to "do it"
a 3' gauge, outside frame 2-6-6-2, in HO scale. The MDC frames and tender, are leftovers from my 2-4-4-2 build. Yeah, it's that old. The boiler is a piece of PVC pipe, and the cab is scratchbuilt with styrene sheet and strip. I also decided to modify the steam chests to piston valves, instead of the original slide valves, and the intention is to equip the loco with Walschaerts Valve gear, instead of the Stevenson gear that came with the MDC kits.
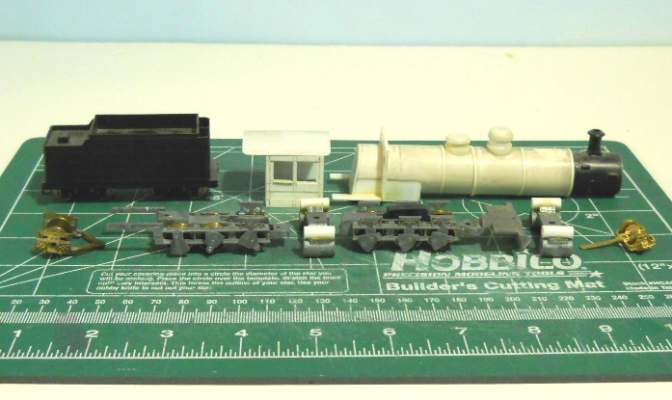
The part of this build that put a halt to construction, was the "running gear", so that will be my starting point for this challenge. My first concern is where I will mount the motor, and how I'll get that connected to the drivers.
I have learned a few tricks for working with styrene, metal, and hopefully PVC, that should come in handy for this project.
The use of "Hot melt" adhesive for securing the motor in place is another trick I may well use here.
Finally, don't be too surprised if this loco receives water tanks, up on the boiler, and becomes a 2-6-6-2T with tender.
We always learn far more from our own mistakes, than we will ever learn from another's advice.
The greatest place to live life, is on the sharp leading edge of a learning curve.
Lead me not into temptation.....I can find it myself!
Posts: 3,755
Threads: 44
Joined: Dec 2008
Interesting project, quite the challenge! 
Mike
Sent from my pocket calculator using two tin cans and a string
Posts: 178
Threads: 7
Joined: Dec 2008
Nice work so far Pete. 
I'll enjoy watching your progress with this project.
Ray Marinaccio
Posts: 4,553
Threads: 100
Joined: Dec 2008
Tyson Rayles » Sun Jan 13, 2013 9:14 pm, wrote:
"Interesting project, quite the challenge!  "
ray_m » Mon Jan 14, 2013 12:09 am, wrote:
" Nice work so far Pete. 
I'll enjoy watching your progress with this project."
Mike, if it wasn't interesting, it  wouldn't be a challenge....  
Ray, I'll try to make it a bit more "enjoyable"  , than watching Grass Grow - - 'specially where it's winter time here. 
We always learn far more from our own mistakes, than we will ever learn from another's advice.
The greatest place to live life, is on the sharp leading edge of a learning curve.
Lead me not into temptation.....I can find it myself!
Posts: 4,553
Threads: 100
Joined: Dec 2008
I was in the process of upgrading the steam chests to piston valves, when I realized that I had to increase the diameter of the lead cylinders, because this loco is supposed to be a compound articulated.
I was going to post a photo of the progress, but, when I try to open the shot in Corel photo pro, I get an
" invalid file format " message. It's not the first time, and it usually means that I have to clear the camera's memory, and re-shoot the picture. ( the following sixteen pages of commentary have been deleted as inappropriate reading for any civilized person ) 
 I am getting just a bit tired of Software/hardware/device/common sense, incompatibilities.
We always learn far more from our own mistakes, than we will ever learn from another's advice.
The greatest place to live life, is on the sharp leading edge of a learning curve.
Lead me not into temptation.....I can find it myself!
Posts: 3,021
Threads: 160
Joined: Dec 2008
This definitely should be interesting. Looks like you are using the same lead truck as I used for my 2-6-2t.
--
Kevin
Check out my Shapeways creations!
3-d printed items in HO/HOn3 and more!
<!-- m --><a class="postlink" href="https://www.shapeways.com/shops/kevin-s-model-train-detail-parts">https://www.shapeways.com/shops/kevin-s ... tail-parts</a><!-- m -->
Posts: 4,553
Threads: 100
Joined: Dec 2008
nachoman Wrote:This definitely should be interesting. Looks like you are using the same lead truck as I used for my 2-6-2t.
 I thought it was too.
I'm using one of the MDC ? Roundhouse "Old Time Tank Cars" to modify the tender to a Vanderbilt. My plan is to use a can motor in the tender, and a universal drive, almost identical to the 2-4-4-2.
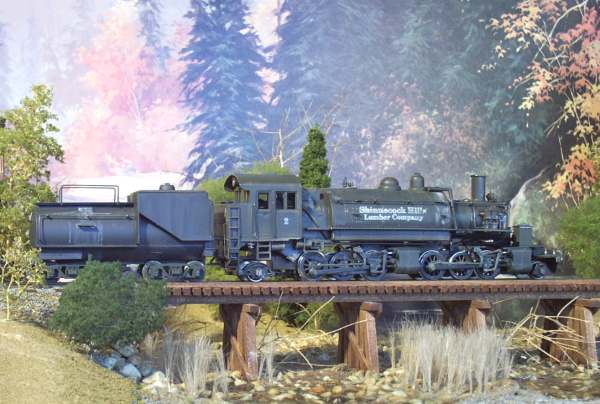
The decision to use a Vanderbilt tender, has me thinking more seriously about a boiler mounted water tank.
much like this Standard gauge 2-6-6-2T w/ Tender.
Lead engine cylinders have been enlarged for exhaust steam operation ( compound/Mallet ).
Realized that I have to run to the Hobby Shop, I need NWSL gearboxes !! :o for both "engines" :o
We always learn far more from our own mistakes, than we will ever learn from another's advice.
The greatest place to live life, is on the sharp leading edge of a learning curve.
Lead me not into temptation.....I can find it myself!
Posts: 4,553
Threads: 100
Joined: Dec 2008
The Hobby Shop had to order the gearboxes I need, from NWSL, so the running gear, is temporarily "waiting parts".
I've done some " cut/hack/butcher/chainsaw-massacre " work to the tender and an "Olde Time" tank car.
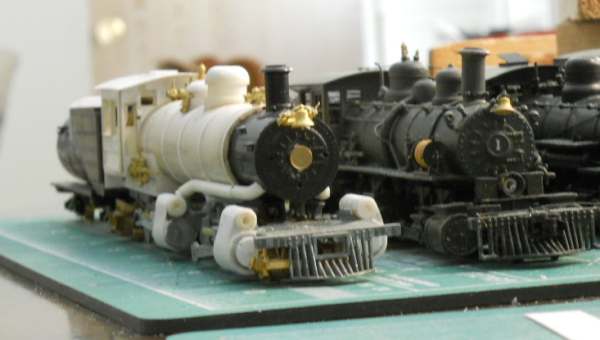
Here, front to back, "The Project" 2-6-6-2, the 2-4-4-2, and a 2-8-2 w/ another Kit-bashed Vanderbilt Tender.
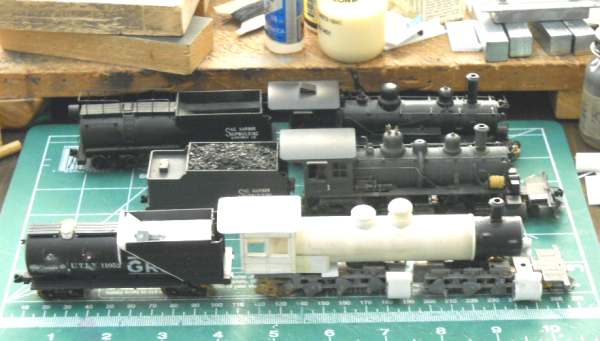
I have to make another trip to the H/S, I don't have a generator, and I think I'll equip this loco with a Top Feed Check Valve,
so I'll need to get one of those, along with the generator.
The can motor I'll be using, is a Sagami 16304-9. It fits perfectly inside the tender. I'll have to build a motor mount for it, that will have the end cap of the tank attached, so the whole assembly can be slid out the back end, for "motor replacement" ( if that is ever needed ). A single mounting screw at the bottom of the tank, should be enough to hold it in place.
I decided to leave the sand dome, and the steam dome, where they were ( based on Sierra Railways 2-6-6-2, #38 ).
The sand for the lead engine will be on the pilot, most likely two boxes, with the headlamp in the center. I'll be using the same Power Reverse unit that the 2-4-4-2 has, and the same "front end" bell.
We always learn far more from our own mistakes, than we will ever learn from another's advice.
The greatest place to live life, is on the sharp leading edge of a learning curve.
Lead me not into temptation.....I can find it myself!
Posts: 4,553
Threads: 100
Joined: Dec 2008
Found some brass castings for the loco,
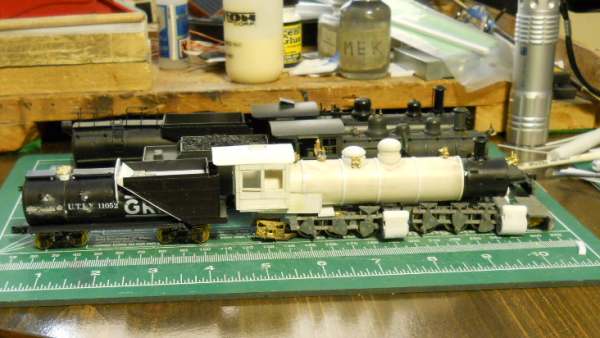
Cut the opening for the cab vent, and framed it
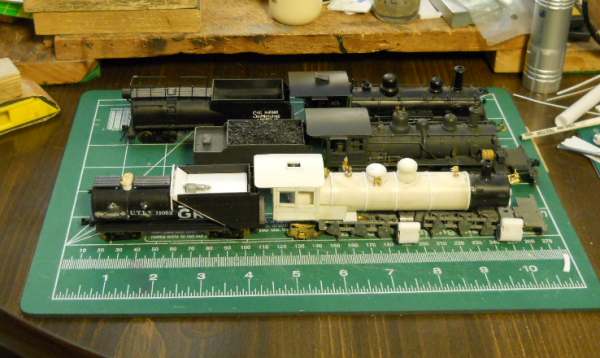
New fittings, from the cab front, forward,
1- a Pyle Generator. 2- A turret, with Pop Valves, and Whistle. 3- On the sand dome, two pipe sand valves on both sides.
4- Just behind the smoke box, a Top Feed Check Valve. 5- On the smoke box front, the Bell.
6- on the tender, the water hatch.
The "thing" laying in the coal bin of the tender, is the tender brake cylinder.
I also found Back-head details, but those can't be applied until the frames are done, and the cab floor is in place.
So !!, for now, at least, I am, once again, back to the original delay that made this a "Get Off Your Duff" project- - - - - -
the running gear :o 
We always learn far more from our own mistakes, than we will ever learn from another's advice.
The greatest place to live life, is on the sharp leading edge of a learning curve.
Lead me not into temptation.....I can find it myself!
Posts: 4,553
Threads: 100
Joined: Dec 2008
Still waiting on the new gearboxes, so, some of the "easy" work.
I hung a cross compound air pump on the smoke box front, ( Sumpter Valley #250, 4th loco back in the picture, had the compressor there ).
With the front mount Bell, it looks too crowded. My next "work session", first thing, move the compressor to the Left hand, "Fireman's" side, and repair the damage to the smoke box front.
I got the side rods, and the piston rods installed. I need to adjust ( shorten) the crosshead guides, and build, and install, the supports for them. I also got the power reverse unit installed, and started on the steam supply pipes, for the rear engine.
Once the compressor is moved, and the supply pipes are done, it's time to complete the frame modifications so I can install the cab floor, and begin the back head details. Somewhere in the middle of all that I have to mill the top of the frame castings, for clearance for the universal drive shafts that will allow the motor connections to the drivers.
No, there is no prototype for this locomotive. Then again, there is no prototype for the locomotive builder, Sag Harbor Shipbuilding and Dry Dock Company. I am using my own limited knowledge, the model of the SVRY #250, and the model and photos of Sierra Railway's #38, as "references" to "what, and where".
I have stumbled onto the first of what will probably be many *problems*. The shafts on the main driver counterweights, aren't long enough for the side rods, drive rods, AND the eccentric for the valve gear. Looks like the only way out of this one, is to remove that shaft, drill and tap the counterweight, and insert a new, longer shaft. ( I really do want Walschaerts valve gear on this loco )
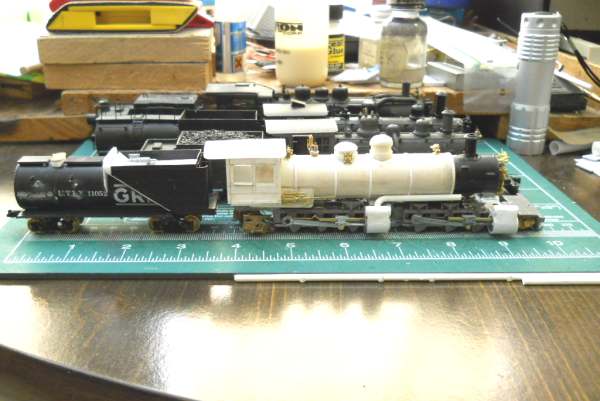
Close-up of the running gear, the Trailing truck, and the Power Reverse unit.
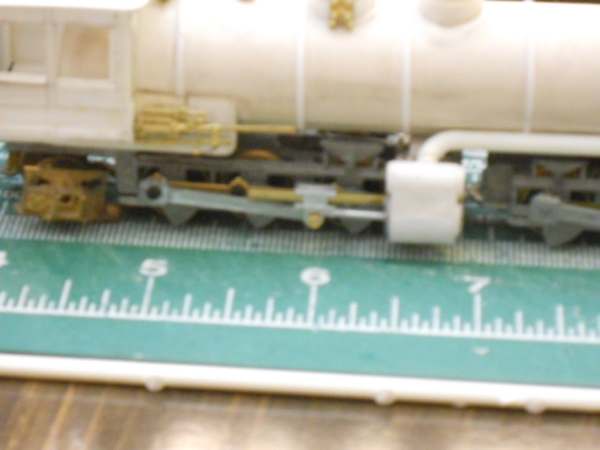
a :o clear shot :o of the right hand side, and the first part of the main steam pipe installation.

We always learn far more from our own mistakes, than we will ever learn from another's advice.
The greatest place to live life, is on the sharp leading edge of a learning curve.
Lead me not into temptation.....I can find it myself!
Posts: 3,755
Threads: 44
Joined: Dec 2008
Mike
Sent from my pocket calculator using two tin cans and a string
Posts: 4,553
Threads: 100
Joined: Dec 2008
I went ahead and added the cab floor, and a few of the cab interior details. The Throttle casting I have is for a "Front End Throttle"  I'll have to scratch build the throttle. :o
The Main Steam Pipes are done, and the Air Compressor has been moved to the right hand side.
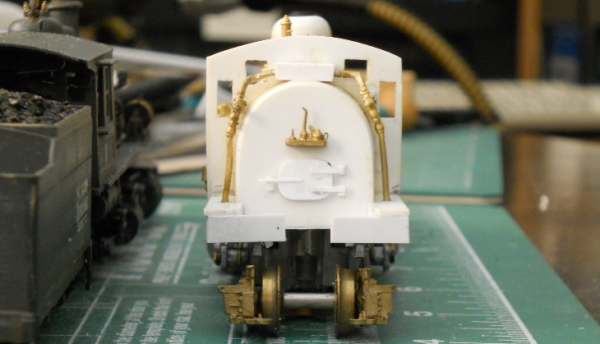
The injectors are mounted inside the cab, so I can run the water pipes to the top feed check valve. I was also able to build the firebox door, and get it in place. There's still some cutting and trimming to do, at the floor level,and a few more "cab interior bits" to install, before the cab can be permanently attached.
We always learn far more from our own mistakes, than we will ever learn from another's advice.
The greatest place to live life, is on the sharp leading edge of a learning curve.
Lead me not into temptation.....I can find it myself!
Posts: 990
Threads: 47
Joined: Jan 2009
This looks to be a very interesting free-lance engine project - done with many many knowledge. Wish you success!
Cheers, Bernd
Please visit also my website www.us-modelsof1900.de.
You can read some more about my model projects and interests in my chronicle of facebook.
Posts: 4,553
Threads: 100
Joined: Dec 2008
modelsof1900 Wrote:This looks to be a very interesting free-lance engine project - done with many many knowledge. Wish you success!
Deciding to make a shipyard, the "Parent Company" of "my railroad", opened creative doors that normally wouldn't have existed. All that was needed was the addition of "Locomotive manufacturing Specific" Machines, and the shipyard was 'in business" !    And I have a couple of unique, but thoroughly justifiable, Steam Locomotives, in "The Modern Era".
It helps, that the "Shipyard owner ", ( ME ), is a "steam freak"   
Got up to the Hobby Shop Yesterday, got some 0-80 screws that I needed, and they are just about the right diameter to replace the side rod / drive rod shafts on the main driver counterweights. I will now have to carefully remove the four counterweights, cut off the existing shafts, and replace them with longer ones, and I'll be ready to build the valve gear.
We always learn far more from our own mistakes, than we will ever learn from another's advice.
The greatest place to live life, is on the sharp leading edge of a learning curve.
Lead me not into temptation.....I can find it myself!
Posts: 3,021
Threads: 160
Joined: Dec 2008
I thought I posted this a few days ago, but apparently it didn't post -
I had to replace the pins on my 2-8-0 due to wear - I cut the pins as close to the counterweights as possible, drilled through the pin and counterweight and inserted a brass tube of the same diameter and epoxied in place. I then cut the brass tube the right length, and tapped for a 00-90 hex head screw. So far, it has worked great, and much better than the original pins.
--
Kevin
Check out my Shapeways creations!
3-d printed items in HO/HOn3 and more!
<!-- m --><a class="postlink" href="https://www.shapeways.com/shops/kevin-s-model-train-detail-parts">https://www.shapeways.com/shops/kevin-s ... tail-parts</a><!-- m -->
|


 wouldn't be a challenge....


 I thought it was too.
 I'll have to scratch build the throttle. :o
