Posts: 12,037
Threads: 579
Joined: Nov 2008
OK, I'm a glutton for punishment, but I went and got a couple more of these wooden puzzle things. I'm kind of hooked, they are fun to build, require total concentration or you can screw up big time and so you shut out the rest of the world while you're working on them. Plus, when you're finished, you have something you can display.
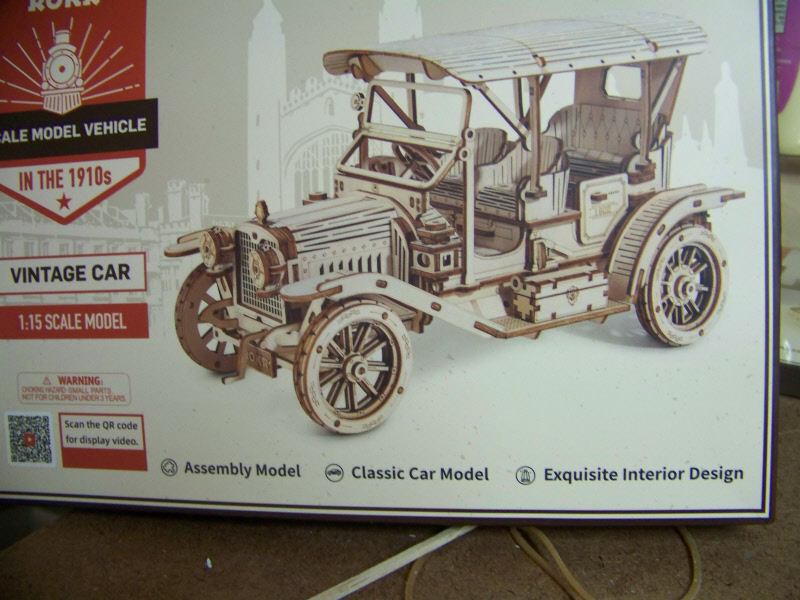
This one is an old antique automobile built sometime around 1918. No particular model specified, but it looks close to what was sold back around then. It has a total of 298 parts and does not have any motive power, but that's OK. The steam engine did and the power train fell apart on it and so it wouldn't run. The machine gun however shot rubber bands and ejected "spent cartridges", and it did work.
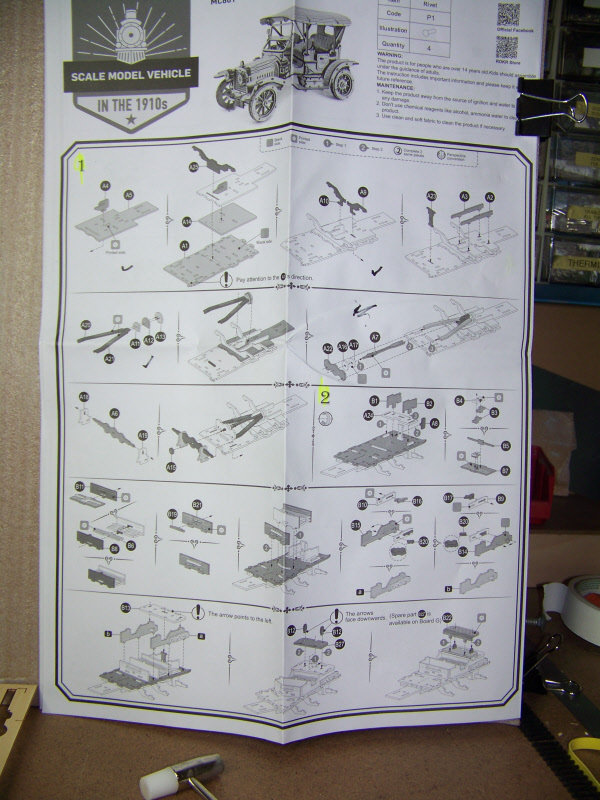
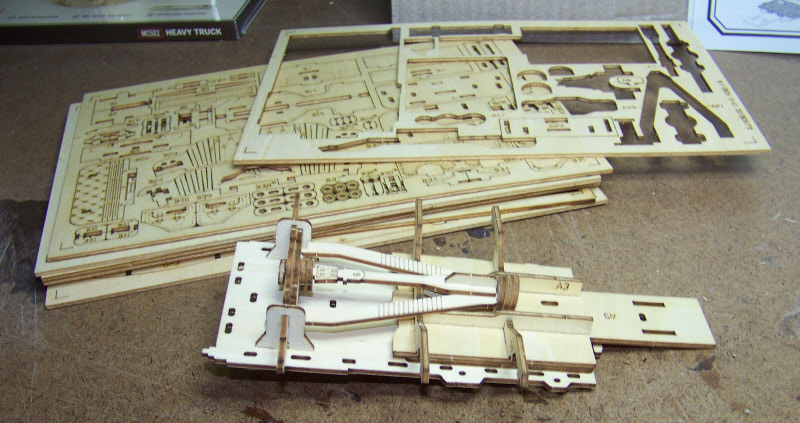
I will try to remember to take progress photos, this one is of step one. There were nine sub-steps and 23 individual pieces for what looks like the beginning of the underside.
The goal:
The "how to":
Step 1 completed:
Don (ezdays) Day
Board administrator and
founder of the CANYON STATE RAILROAD
Posts: 1,312
Threads: 34
Joined: Mar 2009
Well this is something different. Doesn't seem to be that hard to understand the instructions. I for one can't wait to see it completed.
Matt
Conrail's Blairsville Cutoff - A Fictitious Alternative Route Over The Allegheny Mountains From Blairsville, Pa to Cresson, Pa
Milepost 363.8 to Milepost 338.9
Posts: 2,586
Threads: 52
Joined: Dec 2008
I think Don has lost his mind   . These wood kits look like mental torture devices. However, once they are done they do look cool.
Posts: 3,755
Threads: 44
Joined: Dec 2008
What? you aren't done yet Don? With all the experience you now have I would think you could knock these things out in a couple of hours! It says they are scale models, do you know what the scale is?
Mike
Sent from my pocket calculator using two tin cans and a string
Posts: 12,037
Threads: 579
Joined: Nov 2008
(02-01-2024, 08:29 AM)Tyson Rayles Wrote: What? you aren't done yet Don? With all the experience you now have I would think you could knock these things out in a couple of hours! It says they are scale models, do you know what the scale is?
The scale is 1:15, almost big enough to drive. Why is it taking so long you ask? Well, see my next post and that should answer your question.
Don (ezdays) Day
Board administrator and
founder of the CANYON STATE RAILROAD
Posts: 12,037
Threads: 579
Joined: Nov 2008
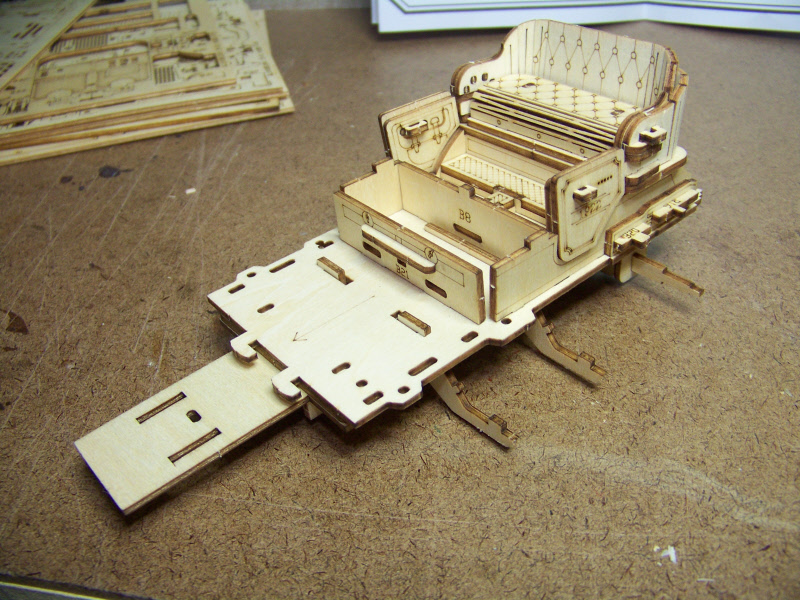
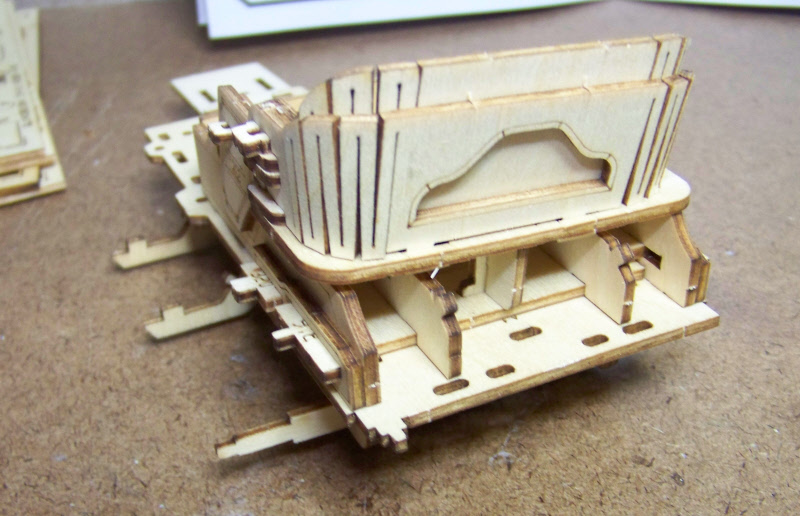
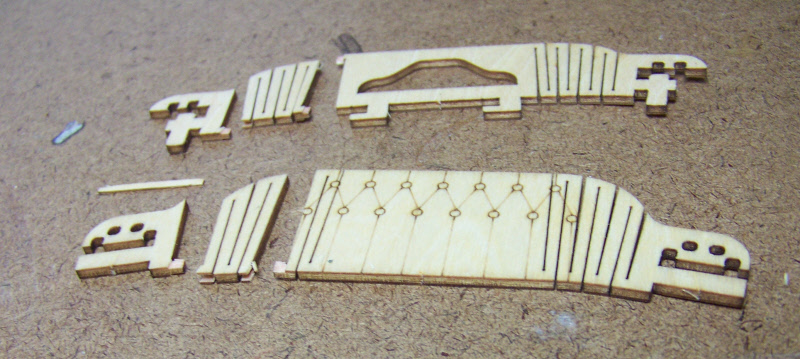
I am now finished with step #2. There were 22 sub-steps and 40 parts to deal with. The first photo shows where I was down to the last of step #2, then hit a snag. I wondered why the instructions said where to find spare parts for B23 and B24, which were the parts that curve around the back seat and couldn't see why they would furnish spares for two large parts. Well, I found out, after attaching the doors you have to curve the parts in order to line up some holes for more parts, then try to get everything on the body. Why spares, well they don't like to curve, that's why. They break at one or more of the many slits and the last photo shows how. I have a good two hours assembling, stripping back and reassembling, then attaching that sub-assembly. The second time though you learn to be more gentle and add some masking tape to aid in assembly. Even then, I heard a "crack", fortunately, the break is hidden.
On to step #3, maybe later, maybe tomorrow, just whenever I feel the urge to work on it.
Step #2 before adding the seat and door sub-assembly
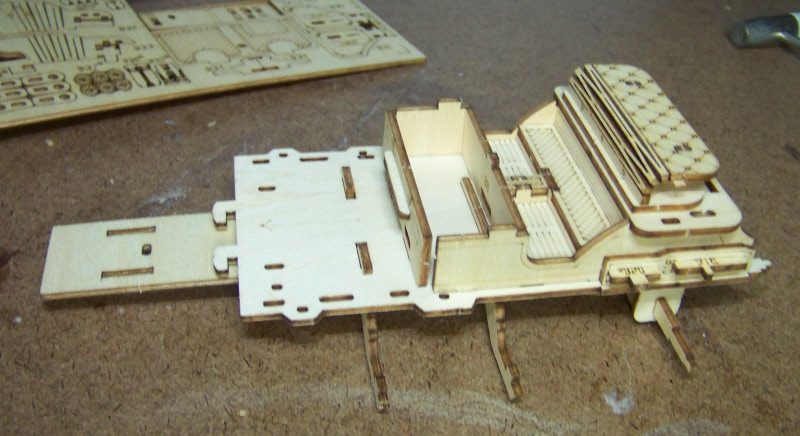
Step #2 completed, front
Step #2 completed, rear
Original parts B23 and B24 if you're not careful
Don (ezdays) Day
Board administrator and
founder of the CANYON STATE RAILROAD
Posts: 1,352
Threads: 149
Joined: Jan 2009
Don old wood workers trick steam.
Jim
Posts: 1,312
Threads: 34
Joined: Mar 2009
It's looking good Don. You're making good headway with it.
Matt
Conrail's Blairsville Cutoff - A Fictitious Alternative Route Over The Allegheny Mountains From Blairsville, Pa to Cresson, Pa
Milepost 363.8 to Milepost 338.9
Posts: 12,037
Threads: 579
Joined: Nov 2008
(02-01-2024, 02:53 PM)jim currie Wrote: Don old wood workers trick steam.
Jim
That's worth knowing. I need to curve the two front seats, the hood and a few other parts and some do not have spares. I'll try it, thanks
(02-01-2024, 02:54 PM)LiveSteamer Wrote: It's looking good Don. You're making good headway with it.
Thank you good sir, regardless of the little snags, it really is a fun project. The instructions are good and very detailed. Miss one part or get it in wrong and you are in deep do-do...  That's what I like about it, the total concentration required, I can block out all the BS going on outside my world... 
Don (ezdays) Day
Board administrator and
founder of the CANYON STATE RAILROAD
Posts: 12,037
Threads: 579
Joined: Nov 2008
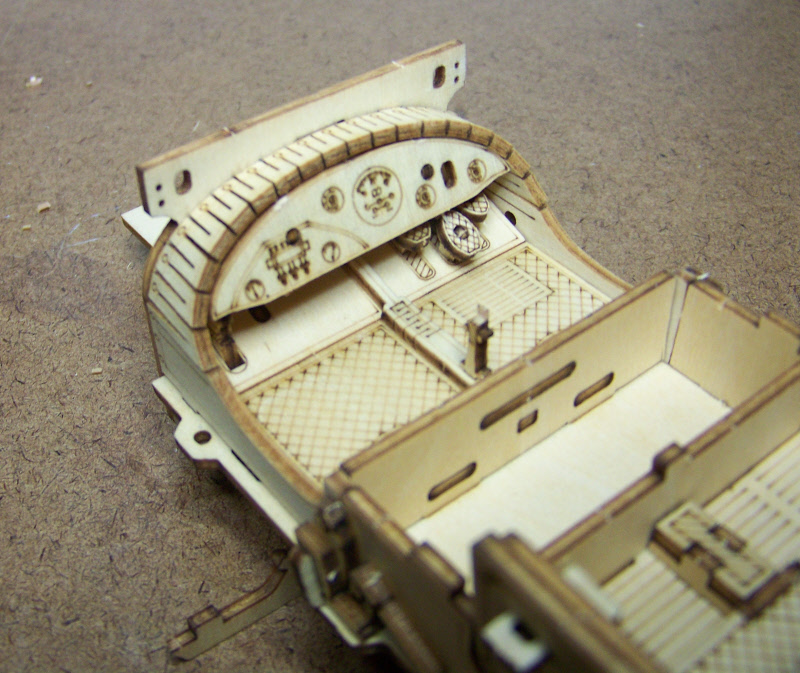
Just finished step 3. There were 9 sub-steps and 21 parts, mostly dealing with the driver controls and dashboard. It did require that cowling to be curved so based on Jim's suggestion, I just soaked the piece in water for a few minutes and it got as soft as I needed and curved without an issue. They gave me a spare one, just in case. It's good to know that works because step 4 deals with the front seat and has five parts that get curved and not all have spares. The only issue is that Tab A no longer fits easily in slot A, but a file takes care of that. And Mike wonders why it's taking me so long to put this together. If it was easy, I'd give it to my great-grandson to assemble. 
Don (ezdays) Day
Board administrator and
founder of the CANYON STATE RAILROAD
Posts: 12,037
Threads: 579
Joined: Nov 2008
Got though step 4 fairly well, all about adding the front seat. Problem is that five of the parts used have curves. But thanks to Jim's suggestion of steaming that I never thought of, I found that soaking in water was just as effective. Lots more curved parts to go though. So far I've used 96 out of the 298, so there's a way to go.
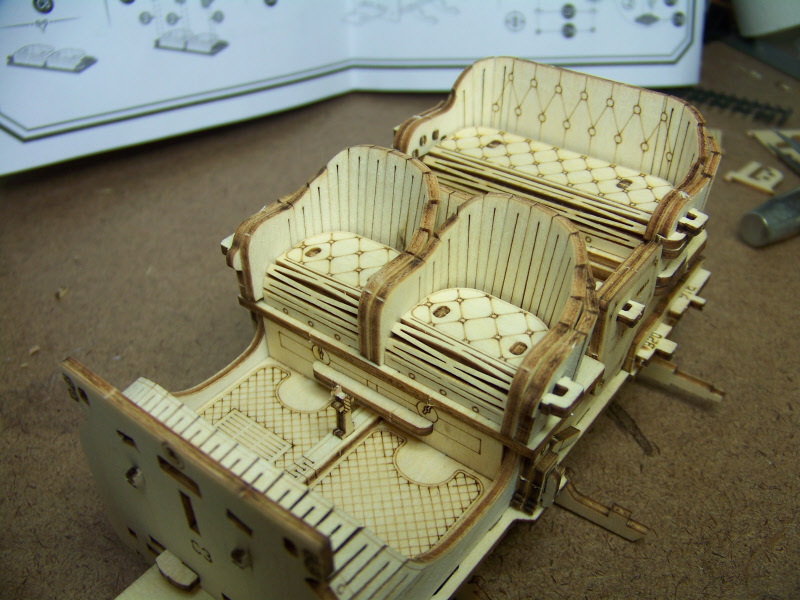
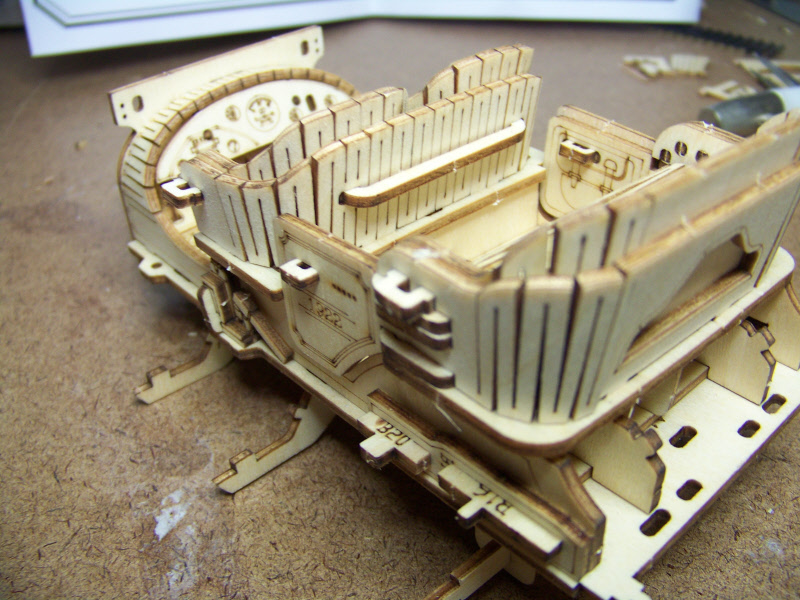
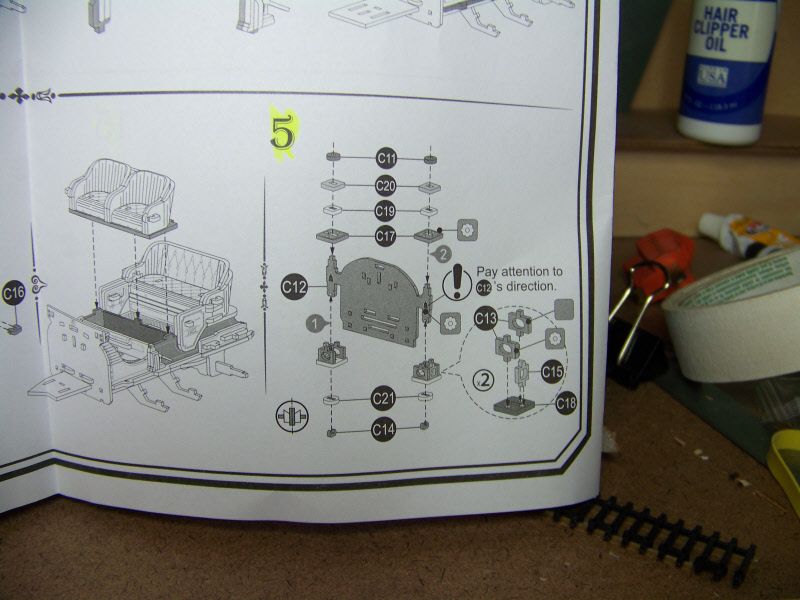
Here's the instructions for the last of step 4 and just about all of step 5. That step used 21 parts just for the lamp assemblies. Not difficult, but a lot of very small parts.
Don (ezdays) Day
Board administrator and
founder of the CANYON STATE RAILROAD
Posts: 10,798
Threads: 248
Joined: Dec 2008
Posts: 1,312
Threads: 34
Joined: Mar 2009
Matt
Conrail's Blairsville Cutoff - A Fictitious Alternative Route Over The Allegheny Mountains From Blairsville, Pa to Cresson, Pa
Milepost 363.8 to Milepost 338.9
Posts: 12,037
Threads: 579
Joined: Nov 2008
Don (ezdays) Day
Board administrator and
founder of the CANYON STATE RAILROAD
Posts: 12,037
Threads: 579
Joined: Nov 2008
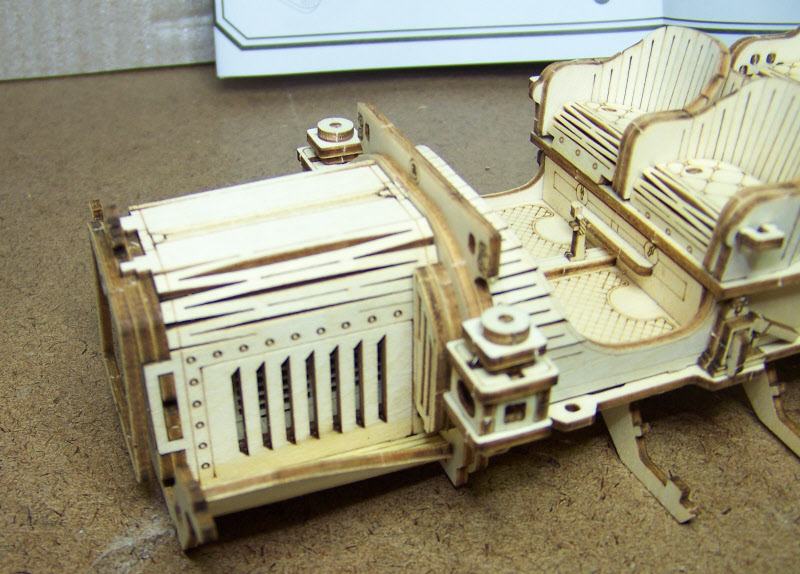
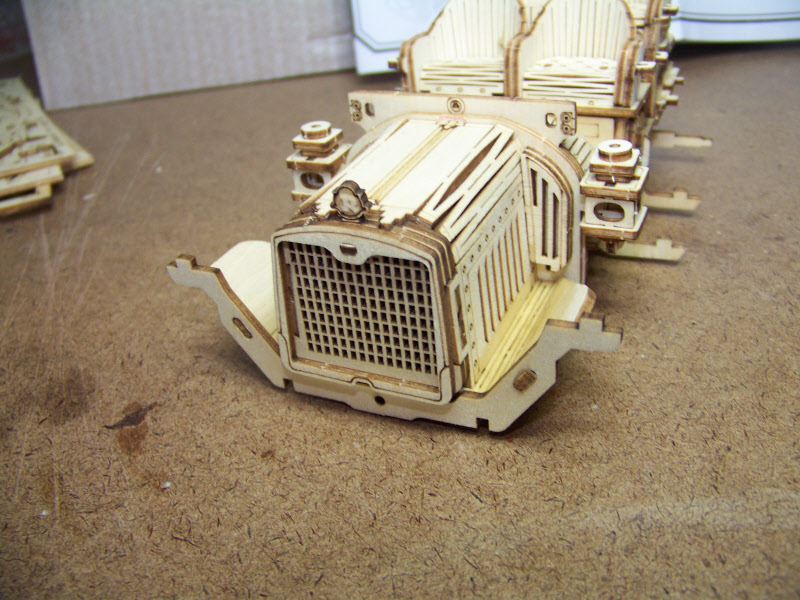
I am just zipping though this, finished step 5 (21 parts) and step 6 (15 parts), but I'm still not halfway there. It looks pretty close to being finished but I've only used up 132 parts out of 298.
Step 5 was all about the lanterns. Step 6 got the engine covered including the radiator. Note that there are parts inside the cowling that kind of look like more radiators. They are not structural so I'm guessing that's what they represent. I don't know why 'cause there ain't no engine in that sucker.... 
Step 5, lanterns installed:
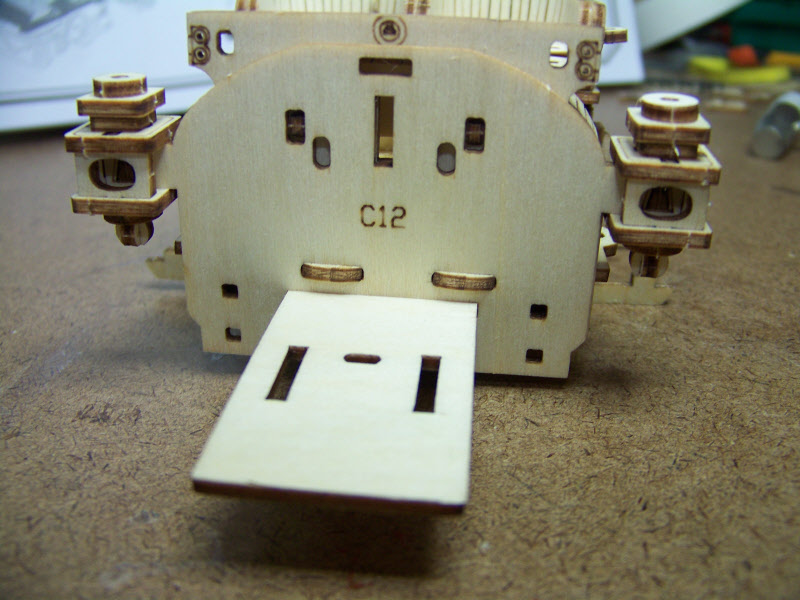
Step 6, engine cowling, radiator and fender supports installed:
Don (ezdays) Day
Board administrator and
founder of the CANYON STATE RAILROAD
|


 . These wood kits look like mental torture devices. However, once they are done they do look cool.


