Posts: 12,037
Threads: 579
Joined: Nov 2008
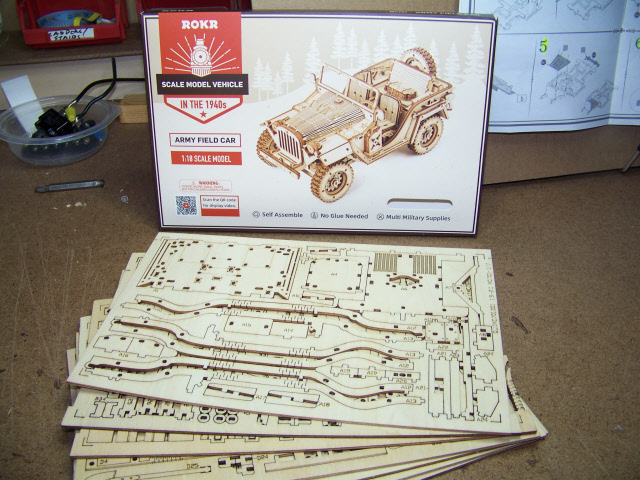
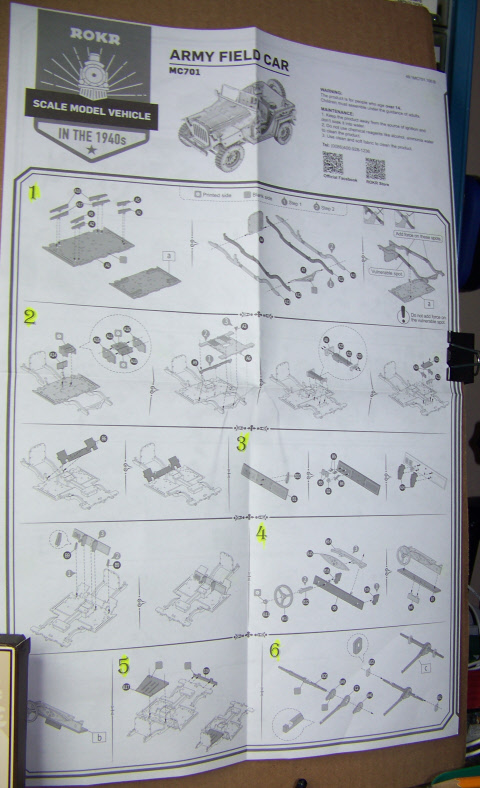
Well, here we go again, I just can't get enough of these wooden puzzle pieces. They call them puzzles, but they're really models with a lot if specific instructions to follow. A puzzle would be, "here's 368 pieces of wood, you figure out how to put it together". Never could happen, so I'm glad that the instructions are accurate, and the end result is as intended as long as you don't miss a step. This one has 30 steps, with many sub-steps as you can see from this instruction sheet #1, I figure around 15 to 20 hours to complete.
Don (ezdays) Day
Board administrator and
founder of the CANYON STATE RAILROAD
Posts: 10,798
Threads: 248
Joined: Dec 2008
Well Don I found this video that should help you with this build. jeep build
Charlie
Posts: 1,127
Threads: 86
Joined: Nov 2010
Don,
all started here: https://en.wikipedia.org/wiki/GAZ-A
GAZ-A, Ford-A, the soviets were champions of copy of US products. Nearly all vehicles they made hat US roots.
Next step: https://en.wikipedia.org/wiki/GAZ-M1
The Soviet version of the Ford Model B.
Further development: https://en.wikipedia.org/wiki/GAZ-61
They put the sedan body onto a 4X4 chassis.
https://en.wikipedia.org/wiki/GAZ-61n
Then they started copying the Wills Jeep with the Parts they had already available: https://en.wikipedia.org/wiki/GAZ-61
Going further: https://en.wikipedia.org/wiki/GAZ-67
This is the prototype of your model.
Post war development: https://en.wikipedia.org/wiki/GAZ-69
The Cold War type: https://en.wikipedia.org/wiki/UAZ-469 is still in production and in use in the Ukrainian War.
Lutz
Posts: 12,037
Threads: 579
Joined: Nov 2008
Wow, take apart a Jeep and rebuild it in four minutes, about the time it took for me to take the first few parts off the sheet. The thing is, I'm in no rush and they were.
Lutz, that's a lot of history there, I wonder if they can field strip their version of the Jeep in two minutes?
I've just gotten steps one and two done and it's taken me one hour to do that, so I think my estimate of 15 to 20 hours is on target.
Don (ezdays) Day
Board administrator and
founder of the CANYON STATE RAILROAD
Posts: 1,312
Threads: 34
Joined: Mar 2009
Oh I can't wait to see the final product. If I wasn't deep in my projects I would try my hands at these. Well who knows, maybe I will someday.
Matt
Conrail's Blairsville Cutoff - A Fictitious Alternative Route Over The Allegheny Mountains From Blairsville, Pa to Cresson, Pa
Milepost 363.8 to Milepost 338.9
Posts: 2,586
Threads: 52
Joined: Dec 2008
This looks like fun. Can't wait to see it.
Posts: 12,037
Threads: 579
Joined: Nov 2008
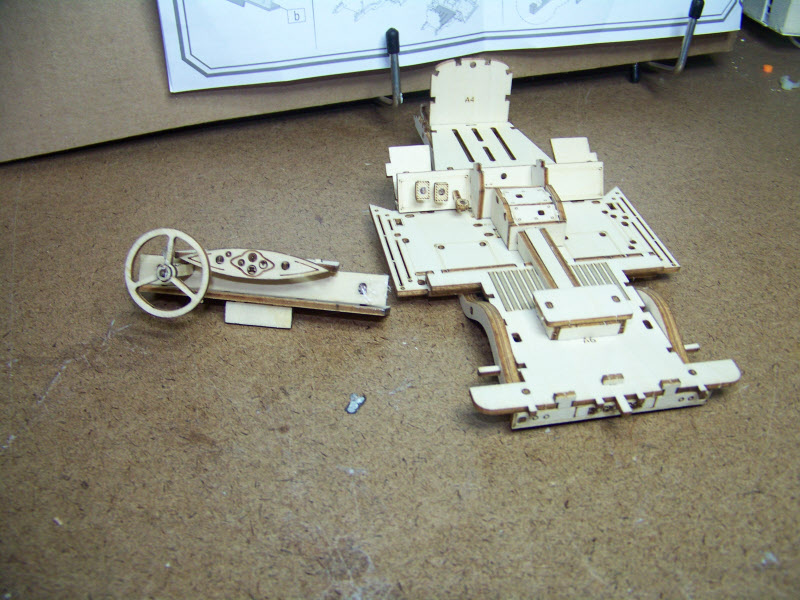
Thanks all, it is fun, also takes concentration which is why I enjoy doing these. I've now completed steps 1-5. I've got a bit over two hours into it already, about a half-hour per step except step 5 which was only two pieces and took just a few minutes. I find that some of these parts, like the gas/clutch/brake and dashboard requires a bit of glue since the parts tend to come loose easily, more so than on the other vehicles that I've already built. Step 4 was to build the dashboard, but apparently, it will be installed later. The next few steps deal with the undercarriage.
Step 1, the chassis frame with 15 parts:

Steps 2-5 adds another 40 parts and it still doesn't look like a Jeep yet:
Don (ezdays) Day
Board administrator and
founder of the CANYON STATE RAILROAD
Posts: 6,670
Threads: 1,136
Joined: Nov 2008
Oh Wow!!!!
My brother-in-law inherited his father's 1956 Willies
This should me neat to watch  
Posts: 12,037
Threads: 579
Joined: Nov 2008
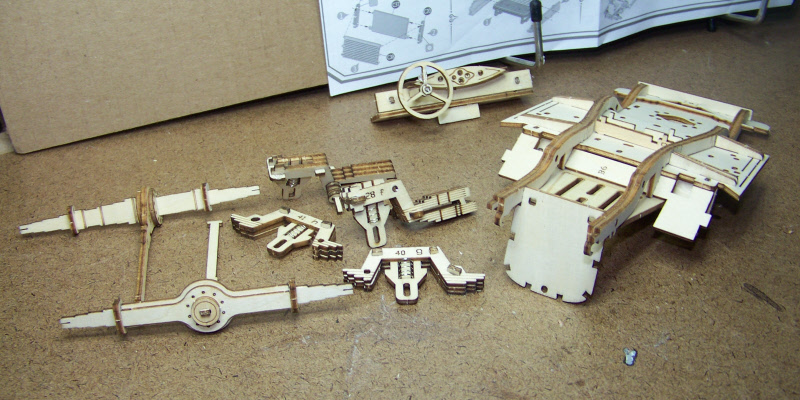
Hokie-dokie, just over the 4 hour mark, steps 6-8 were doozies, 47 parts to build six sub assemblies, it looks like the wheels are going to be spring suspended. Step 9 took five minutes to install two parts to the undercarriage, looks like the next steps are going to install the drive train.
Steps 6-9:
Don (ezdays) Day
Board administrator and
founder of the CANYON STATE RAILROAD
Posts: 3,755
Threads: 44
Joined: Dec 2008
Looks like you are really hooked on these models Don! Goodbye model railroading hello wooden model building. Gotta say they look fun but take way to much patience for me.
Mike
Sent from my pocket calculator using two tin cans and a string
Posts: 295
Threads: 18
Joined: Nov 2015
You really are a glutton for punishment but it’s looking great so far!
————————————————————————————
Modeling the East Broad Top as it was between 1937-1942
~Amanda
Posts: 12,037
Threads: 579
Joined: Nov 2008
Thanks again, and yup, it's not hard to get hooked, it's fun and it's not that expensive. I paid just $20 for this Jeep and it looks like it'll be a good 15 hours of entertainment. The trolley car was under $50, but it's animated and might take twice as long to build. This is about the cost of an N scale structure kit, so it's a tossup what I like to build, I just like doing construction work on a small scale.
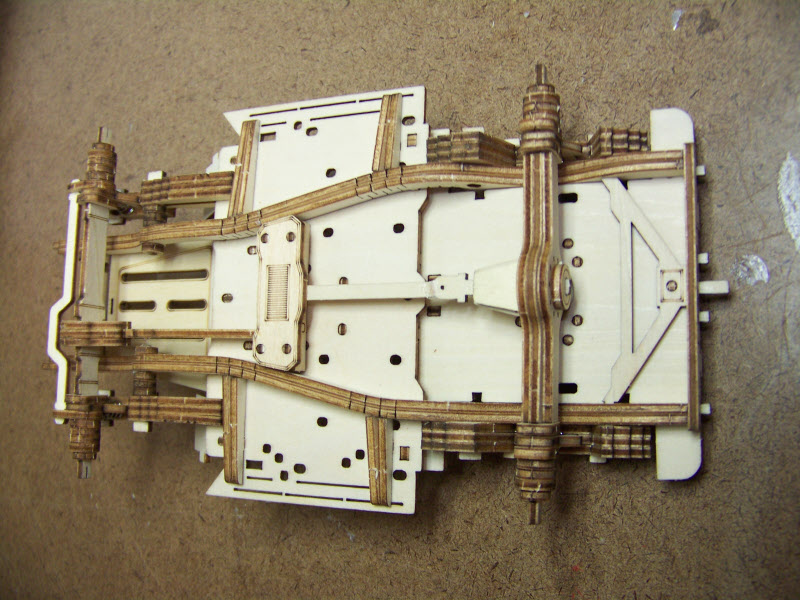
I just finished steps 10 and 11, all undercarriage work. I find that this model is not as tight as some of the others I build by the same manufacturer, so I'm gluing down a few parts that just won't stay put. I am impressed that the wheels all have spring suspensions and they do work. A pity that the steering wheel is fixed though. Here's a shot of where I am now, I'm just shy of six hours into this and a little over 1/3 of the way through.
Don (ezdays) Day
Board administrator and
founder of the CANYON STATE RAILROAD
Posts: 295
Threads: 18
Joined: Nov 2015
As long as you’re having fun that’s all that matters!
————————————————————————————
Modeling the East Broad Top as it was between 1937-1942
~Amanda
Posts: 12,037
Threads: 579
Joined: Nov 2008
(04-11-2024, 12:14 PM)Amalynn Wrote: As long as you’re having fun that’s all that matters! Yup, that's the whole idea, you need to do things that you enjoy doing.
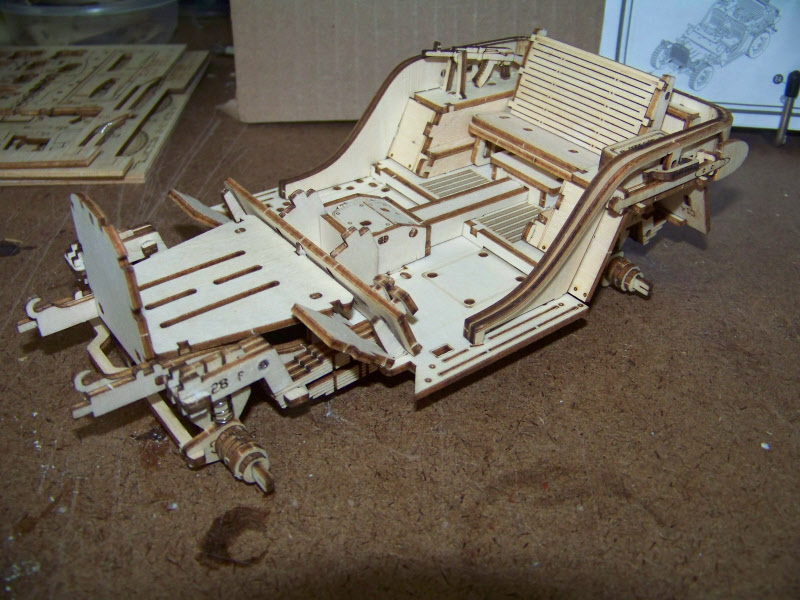
I am now over halfway through construction and it's starting to look like a Jeep. I've just completed steps 12 through 18, all on the topside. So far I've broken two pieces. They give you plenty of spare parts, but not the driveshaft that is cut so that it's flexible and will break easily, which it did. The other broken part is my fault. I also didn't pay attention to another part that was symmetrical but the hole pattern was different on each side so it went in flipped over. Rather than take the assembly apart, I just drilled two holes to hold the AK-47 support bracket. Like I've been saying, this does require an extraordinary amount of concentration or you will screw up.... I've had to back up a couple of times where I've gotten a part in wrong and something else wouldn't fit. 

Don (ezdays) Day
Board administrator and
founder of the CANYON STATE RAILROAD
Posts: 6,670
Threads: 1,136
Joined: Nov 2008
Wow!!! All that detail  
|


