| Welcome, Guest |
You have to register before you can post on our site.
|
| Online Users |
There are currently 69 online users.
» 0 Member(s) | 64 Guest(s)
Applebot, Bing, Facebook, Google, Yandex
|
| Latest Threads |
Rainbows in the Lehigh Va...
Forum: Layouts
Last Post: TMo
Yesterday, 02:21 PM
» Replies: 320
» Views: 72,348
|
Weekly Photo Fun 5/17 - 5...
Forum: Shutterbug area
Last Post: TMo
Yesterday, 01:22 PM
» Replies: 2
» Views: 34
|
SIDE SHOT SATURDAY
Forum: Shutterbug area
Last Post: TMo
Yesterday, 10:43 AM
» Replies: 665
» Views: 190,277
|
The Hobo Camp Fire Is goi...
Forum: Hobo's Camp
Last Post: ezdays
Yesterday, 08:54 AM
» Replies: 56
» Views: 1,484
|
Trains This Day/Month in ...
Forum: Shutterbug area
Last Post: Charlie B
Yesterday, 06:45 AM
» Replies: 30
» Views: 854
|
Anyone up for a 2024 chal...
Forum: Contests & Challenges
Last Post: ezdays
Yesterday, 06:44 AM
» Replies: 15
» Views: 242
|
Server issues
Forum: Forum Announcements
Last Post: ezdays
05-16-2024, 02:08 PM
» Replies: 4
» Views: 2,759
|
Just let us know you stop...
Forum: Stop here and say "Hello"
Last Post: ezdays
05-16-2024, 08:48 AM
» Replies: 319
» Views: 27,291
|
Historic Railroad picture...
Forum: Upper Berth
Last Post: Charlie B
05-15-2024, 07:49 PM
» Replies: 172
» Views: 50,578
|
Tail End Tuesday
Forum: Shutterbug area
Last Post: bdw9535
05-14-2024, 09:41 PM
» Replies: 251
» Views: 73,601
|
Modern Stuff
Forum: HO Modeling
Last Post: LiveSteamer
05-13-2024, 10:21 PM
» Replies: 3
» Views: 215
|
Kalmbach rail magazines, ...
Forum: Upper Berth
Last Post: FiatFan
05-13-2024, 06:27 AM
» Replies: 6
» Views: 120
|
nature unleashed
Forum: Lower Berth
Last Post: LiveSteamer
05-12-2024, 11:17 PM
» Replies: 5
» Views: 217
|
Current Projects
Forum: HO Modeling
Last Post: LiveSteamer
05-12-2024, 11:15 PM
» Replies: 186
» Views: 11,225
|
2024 Big Blue NASCAR Raci...
Forum: Lower Berth
Last Post: ngauger
05-12-2024, 06:51 PM
» Replies: 40
» Views: 2,495
|
|
|
| The Shifter |
|
Posted by: ocalicreek - 12-30-2008, 01:21 AM - Forum: Scratchbuilding and kitbashing - All Scales
- Replies (28)
|
 |
This thread is, for now, a reader's digest version of the posts made over the course of a few years at the Yardbird Trains Yahoo Group.
I will open with a few pictures of the filing. You will see, as time goes by, the continued filing and filing and filing and sawing and grinding to gradually remove bits of zamac from the boiler and eventually the cab. I don't have a really nice picture of the engine pre-filing...shoulda woulda coulda taken one then, I suppose. Oh well.
[albumimg]268[/albumimg]
In this image above you can see the engineer's side. The cast-on details removed include the sand lines, injector pipe and check valve from the boiler, the stay bolts and piping from the firebox, as well as the generator, whistle, headlight above the running board and power reverse below.
[albumimg]267[/albumimg]
On the fireman's side, many of the same details were removed as well as the compressor casting and a big chunk of the running board. Also note the cast on air piping above the cast air tanks has been filed down. Originally I had planned on just adding new piping on top of that flattened area.
[albumimg]266[/albumimg]
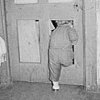
Here you can see the hole drilled through the headlight mount (find the red circle). The hole drilled from above down through the mount was a smaller diameter than the hole drilled from below. It's like one of those tunnel projects where two teams dig, one from each side of the mountain, and meet in the middle. I did all of this drilling with pin vises (one for each diameter bit...saved me from constantly changing bits) by hand with plenty of time, patience, and Singer sewing machine oil for lubricant.
Galen
|

|
|
| CP Scarborough Harbor Branch Line - HO Scale |
|
Posted by: tetters - 12-29-2008, 09:03 PM - Forum: Layouts
- Replies (254)
|
 |
Hello Gents and Gals!
This is where I will post progress of my layout and other adventures in RR modeling on Big Blue. As indicated by the title my new layout when construction begins will be named the Scarborough Harbor Branch Line. As far as I know no such rail road has ever existed. So it is entirely fictional/freelanced. 
The track plan...
![[Image: ScarboroughHarbour.jpg]](http://i229.photobucket.com/albums/ee118/tetters73/ScarboroughHarbour.jpg)
The track plan is 16' x 15' x 1' 11" deep, HO scale switching layout. Based loosely in the mid 50's to mid 60's The RR will use a P2K GP7 and SW9/1200 to switch and move rolling stock to and from industries. The GP7 will act as the road switcher to deliver consists of cars to three customers; Obay Pharmaceuticals, Gern Ind. Food Grade Flux Division, and The Morgue Ales & Brews. One stub will be a team track that I can use to products and materials like coal, machinery (e.g. farm tractors) and other items to local industries. The layouts main feature will be a dock side scene that will include a Walther's Car Float, a RR Tug, and small dock which will act as an extension of the small yard along the harbor front. This is where the SW9 will find its home, switching cars on and off the float docked in the harbor, which will act as an interchange point for the RR. I'm still hashing out a car card system to move the rolling stock however I'm done with the track planning. I look at it and see opportunities for a four person session, two people per crew. Possibly a fifth as a yard master. Trains will mostly consist of 30-40 ft rolling stock with the occasional 50 footer thrown in for good measure. I should be able to make trains 8 cars in length, which is essentially what I was shooting for. The industry stubs are also long enough to make it look like customers who actually need to use rail service for delivery and shipment of products.
Anywho...no real progress to speak of. Except I spent the last couple of nights converting the SW9 I picked up on e-Bay from DC to DCC. The first real challenge I spoke of was removing the cab from the shell. I wanted to do this so I could replace the 1.5 volt light with an LED. You can purchase a decoder from NCE called the SW9-SR. This decoder will allow you to use the existing 1.5 bulb for the rear light. However, I wanted to use LEDs in both the front and rear lights.
First off the essentials to any meaningful decoder installation. Of course beer, wine, tea or coffee would suffice. However, its the holidays and my liquor cabinet fills up this time of the year with gifts of colourful bottles from guests and family. So allow me to indulge.
![[Image: DSC02734.jpg]](http://i229.photobucket.com/albums/ee118/tetters73/DSC02734.jpg)
I understand for the experts and the seasoned folks here, this is old hat. However, there are a number of us still wet behind the ears kids who might find this mildly entertaining. For what its worth, I could not find much of any help on line to show me how to do this. So, if you have nothing important to do like watch your finger nails grow enjoy! 
The first thing you need to do is remove the couplers. Then by gently squeezing the sides of the shell near the front and towards the back close to the front of the cab you can remove the shell from the frame. Actually, if you never put these together as it come in the box you can avoid this step all together. I put them together because I wanted to see it that way and had it do a few laps around the x-mas tree for fun and kicks.
![[Image: DSC02737.jpg]](http://i229.photobucket.com/albums/ee118/tetters73/DSC02737.jpg)
So with the shell off, turn it over and gently pry off the copper contacts off the plastic stubs inside using a # 11 X-acto blade. The contacts are attached to the 1.5 volt bulb and I never did end up re-using them.
![[Image: DSC02741.jpg]](http://i229.photobucket.com/albums/ee118/tetters73/DSC02741.jpg)
First you need to trim the hand rails to the cab door off the back. To do this I used a brand new #11 X-acto blade for a nice clean and flush cut. The hand rails are affixed to the cab and the battery box behind it. So you need to cut the hand rails off one of the pieces. The beauty of this is if you cut them flush when you place the cab back on, it looks like you never touched them. I did not re-glue mine either just in case I decided to remove the cab again for some reason or another.
![[Image: DSC02743.jpg]](http://i229.photobucket.com/albums/ee118/tetters73/DSC02743.jpg)
Then squeeze the shell towards the back where the front of the cab is. This will allow you to lift the cab off slightly.
![[Image: DSC02740.jpg]](http://i229.photobucket.com/albums/ee118/tetters73/DSC02740.jpg)
With some careful coaxing the cab will eventually pop off. It really binds in there and at first I thought maybe it was bonded in place. It's not.
![[Image: DSC02744.jpg]](http://i229.photobucket.com/albums/ee118/tetters73/DSC02744.jpg)
So remove the guts to get at the housing for the light. The cab interior and window parts come out easy as pie.
![[Image: DSC02749.jpg]](http://i229.photobucket.com/albums/ee118/tetters73/DSC02749.jpg)
Because I'm cheap I used a small decoder I had on hand from another loco. Pictured is NCE's D13SR. Also pictured are the LED's and resistors used for the conversion. I picked them up as a set at a Train Show a couple years ago. I do not know who makes them, however the amber glow they give off is something that has grown on me. Doc Wayne commented awhile back the amber LED's look more realistic in the locos, I have come to agree with him.
![[Image: DSC02750.jpg]](http://i229.photobucket.com/albums/ee118/tetters73/DSC02750.jpg)
Intially I was going to use double sided tape to stick the decoder to the motor. However, the shell fits incredibly tight to the frame, so there is no room. So as seen, I placed a couple of strips of electrical tape on the back of the decoder and ended up just taping the decoder to the motor. Which works just fine. What I didn't take a picture of was the Plasti Dip I use to cover up my wire connections. It's like liquid electrical tape and cures in 30 minutes, 24 hours to harden completely. Just brush it on, go mix another drink and leave it. 
![[Image: DSC02753.jpg]](http://i229.photobucket.com/albums/ee118/tetters73/DSC02753.jpg)
So...I don't think I need to go over the basics of decoder installation. Deano and others have provided some excellent tutorials on how to hard wire one up. Here it is all wired up for motor testing sans lights.
Fast forward and here is 7403 with her shell on and all wired ready for action in the yard.
![[Image: DSC02756.jpg]](http://i229.photobucket.com/albums/ee118/tetters73/DSC02756.jpg)
So I hope this wasn't too much. Just felt the need to get going on this. Hopefully this start will keep me honest and motivated.
|
|
|
|
| resizing photos |
|
Posted by: csiguy68 - 12-29-2008, 07:09 PM - Forum: Forum Problems and Requests
- Replies (4)
|
 |
can anyone please tell me how i can re size a photo so i can put it on here? i tried posting some pics i took on saturday and kinda feel like an idiot that i can figure how to post them on here. thanks very much.
todd
|
|
|
|
| Last Post |
|
Posted by: TinGoat - 12-29-2008, 02:33 PM - Forum: Forum Problems and Requests
- Replies (3)
|
 |
Hello Mighty Admins,
A little request.
Can we have the Thread and Thread Starter displayed under "Last Post"? Not just the Thread Starter...
Thanks.
|
|
|
|
|


![[Image: 3152490358_a11c5d7059.jpg]](http://farm4.static.flickr.com/3240/3152490358_a11c5d7059.jpg)
![[Image: 3152489396_70130cdc1a.jpg]](http://farm4.static.flickr.com/3210/3152489396_70130cdc1a.jpg)
![[Image: 3151652529_0111ccfffc.jpg]](http://farm4.static.flickr.com/3083/3151652529_0111ccfffc.jpg)
 So, I’m thinking of building a dedicated work station for all my modeling needs. I have a general idea of the design and would like to get some feed back from you fine folks here on Big Blue.


![[Image: pm2j.jpg]](http://i138.photobucket.com/albums/q253/iis612/pm2j.jpg)
![[Image: pm2b2.jpg]](http://i138.photobucket.com/albums/q253/iis612/pm2b2.jpg)

