Posts: 5,161
Threads: 100
Joined: Dec 2008
Posts: 4,553
Threads: 100
Joined: Dec 2008
  USS Lowry DD-770
1/700 scale, upgrade to FRAM II. This was the first ship I served in. The carrier, in this picture is USS Randolph CVS-15.
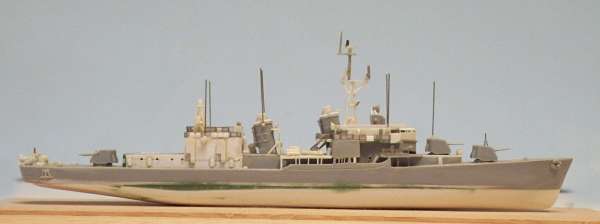
Starboard side:
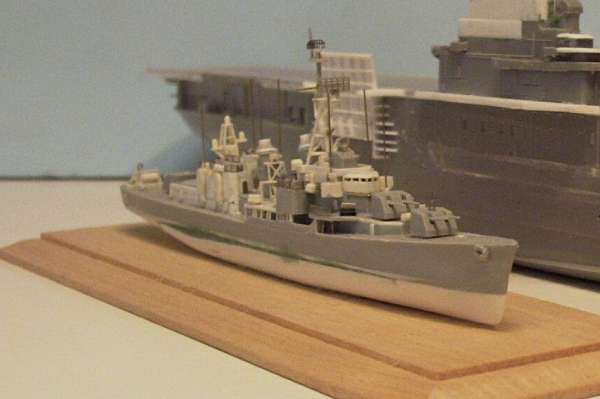
 
----------------------------------------------------------
Pilothouse windows and doors are ready for installation, and I'll get to that today. 
We always learn far more from our own mistakes, than we will ever learn from another's advice.
The greatest place to live life, is on the sharp leading edge of a learning curve.
Lead me not into temptation.....I can find it myself!
Posts: 4,553
Threads: 100
Joined: Dec 2008
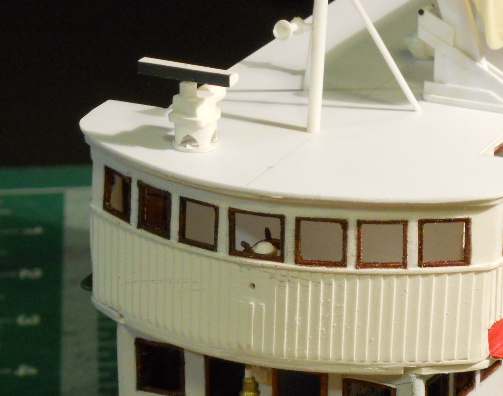
All the windows, and doors are now installed. The time spent making the cutting jigs, and the assembly jigs, really paid off ! I'm quite happy with the way things fit, with only minor "sizing of the openings".
------------------------------------------------------------------------------------
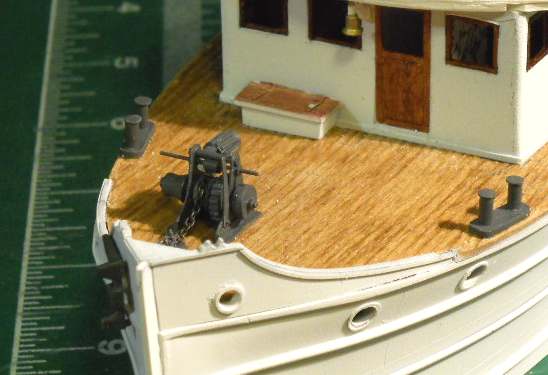
I got the mast built, and "set in place", I found a horn that worked very nicely, attached to the mast. I also built the radar antenna, and set it in place.
-----------------------------------------------------------------------------------
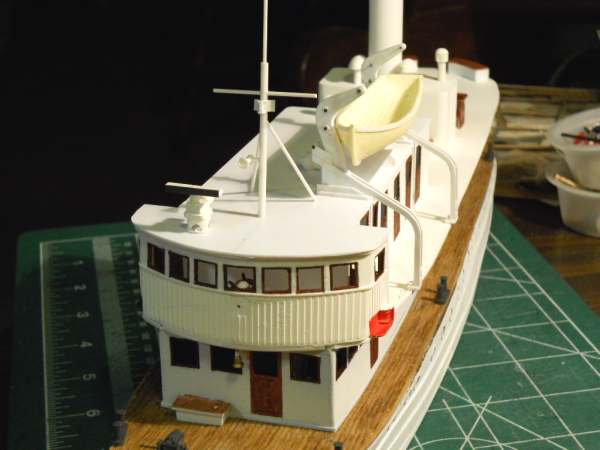
A view of the mast and radar antenna looking aft. Just under the cross bar, is the twenty point range light.
-----------------------------------------------------------------------------------
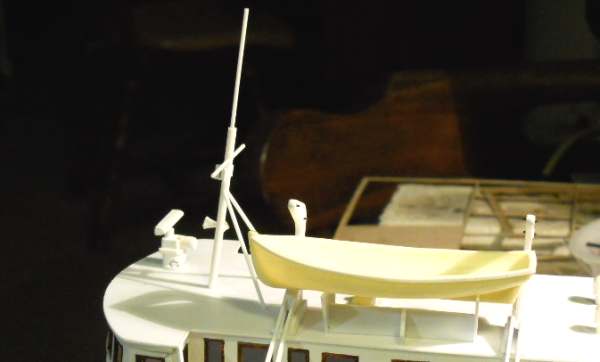
This is probably the best close up shot of the anchor windlass, I was looking to get the ships bell just to the left of the door.
-----------------------------------------------------------------------------------
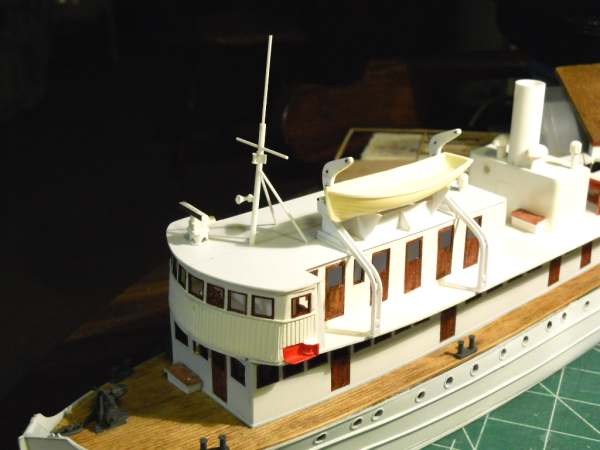
In this last shot, you can see the top of the binnacle, and two of the handles on the helm.
I got the port and starboard running lights painted, while I had paint out
We always learn far more from our own mistakes, than we will ever learn from another's advice.
The greatest place to live life, is on the sharp leading edge of a learning curve.
Lead me not into temptation.....I can find it myself!
Posts: 1,475
Threads: 44
Joined: Dec 2008
Great details on the tour ship,
Neat Naval power as well. I have a cousin who is a navy recruiter.
I am considering putting a ship model together just to see if I would enjoy it  The model I am thinking about getting is a simple balsa wood kit of a sailboat it is 17" long 12" high and 5 " wide proto type unknown to me. It is suppose to be a beginers kit but looks interesting even if it is a crude looking model. I found it in a junk catalog called The lake side collections ?? It was about $9.00 they also sell a wood tank and an aircraft carrier model as well.
Posts: 4,553
Threads: 100
Joined: Dec 2008
AF350 Wrote:I am considering putting a ship model together just to see if I would enjoy it  The model I am thinking about getting is a simple balsa wood kit of a sailboat it is 17" long 12" high and 5 " wide proto type unknown to me. It is suppose to be a beginers kit but looks interesting even if it is a crude looking model. I found it in a junk catalog called The lake side collections ?? It was about $9.00 they also sell a wood tank and an aircraft carrier model as well. The model I am thinking about getting is a simple balsa wood kit of a sailboat it is 17" long 12" high and 5 " wide proto type unknown to me. It is suppose to be a beginers kit but looks interesting even if it is a crude looking model. I found it in a junk catalog called The lake side collections ?? It was about $9.00 they also sell a wood tank and an aircraft carrier model as well.
I had to go look at what you were seeing. Please forgive my "judgement call" here.
I would think that your modelbuilding skills, being in this hobby, are well above what's required for that "kit".
The hull is built up with pre-cut laminations, the masts are dowels, with no shape to them, and the rigging is- - - OK it really " isn't " :o
It is an "artistic piece", not a model of a sailing ship.
Check out http://www.midwestproducts.com/store/pro..._Kits.aspx
Just about any of their $25.00 kits are good starts, and they have an excellent instruction booklet with each kit. You would end up with a model worth displaying, and learn a bit in the process.
While I was working in a hobby store, I built one of the "Muscongus Bay Lobster Smacks", partly to show the process to customers, partly for the enjoyment of building. All the parts, and rigging material is provided, paint and glue are up to you.
You could also click on the GCLaser link in my signature, we have a 38' "commuter" boat kit in HO scale. If you run into any problems building it ( attaching the hull sides is the trickiest part ) I could help, I designed that kit.
It's behind the dock in this pic.
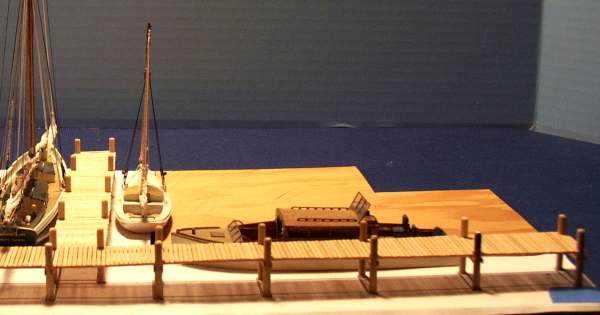
The small sailboat just to the left, is the "Bluejacket" Harbor & Oceans series "Friendship sloop" in HO, this boat was derived from the original Muscongus Bay sloop.
http://www.bluejacketinc.com/honscale.htm for some of their other HO, and N scale kits
Pete
We always learn far more from our own mistakes, than we will ever learn from another's advice.
The greatest place to live life, is on the sharp leading edge of a learning curve.
Lead me not into temptation.....I can find it myself!
Posts: 1,475
Threads: 44
Joined: Dec 2008
Yeah the laminations do look very odd  Being I am mostly into S and O scale maybe a source of plans that I can resize would be better option? It would be a good reason to cast some metal detail parts  Should a plank by plank method with wood bending be a starting place or maybe a solid wood core with a thin flexable planking matertial glued to core method? Do not want to start another hobby at the moment but would be fun to build a ship or two just as a fun exersize in modeling.
Looked at the web links cool stuff.
Posts: 4,553
Threads: 100
Joined: Dec 2008
AF350 Wrote:Yeah the laminations do look very odd  Being I am mostly into S and O scale maybe a source of plans that I can resize would be better option? It would be a good reason to cast some metal detail parts Being I am mostly into S and O scale maybe a source of plans that I can resize would be better option? It would be a good reason to cast some metal detail parts  Should a plank by plank method with wood bending be a starting place or maybe a solid wood core with a thin flexable planking matertial glued to core method? Do not want to start another hobby at the moment but would be fun to build a ship or two just as a fun exersize in modeling. Should a plank by plank method with wood bending be a starting place or maybe a solid wood core with a thin flexable planking matertial glued to core method? Do not want to start another hobby at the moment but would be fun to build a ship or two just as a fun exersize in modeling.
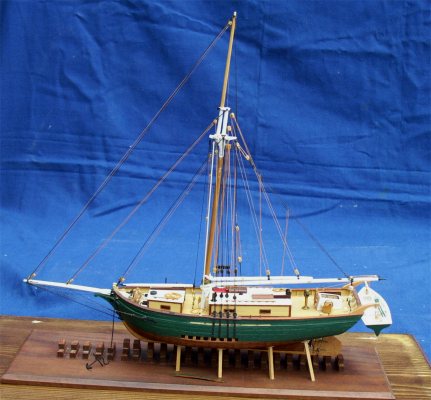
S scale, 1/64 - - - - this, is a 1/64 scale 40' ( length on deck) Cutter,
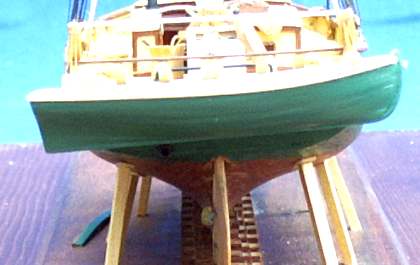
built plank on frame, from my own original lines drawing. It was my first "plank on frame model", and it took six months to loft the 28, double sawn basswood frames, cut the frames, erect them on the keel, and plank the hull with 1/32" X 3/32" mahogany strips. The deck was planked with 1/32" X 1/8" basswood strips. Each plank had to be tapered end to end.
"Should a plank by plank method with wood bending be a starting place ?"
I had built several solid hull models before attempting this. I would highly recommend you do the same.
There are lessons to be learned, about every aspect of modeling a sail powered vessel. Wait until most of those are learned and perfected, before starting a plank on frame hull
After I accomplished the first Plank on Frame, I built the second, a 17' Whitehall skiff, to hang astern. Yes 1/64th scale.
3-3/8" long
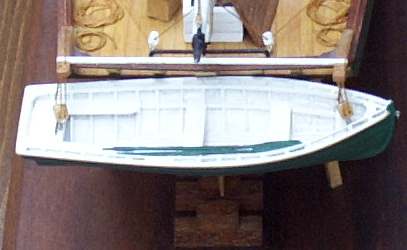
I am thinking about building a plank on frame, waterline model, of a 68' lumber schooner, for my On30 modules.
Ship's curves, are a particularly trying "learning curve". A solid hull model is quicker, and easier on the nerves. :o 
We always learn far more from our own mistakes, than we will ever learn from another's advice.
The greatest place to live life, is on the sharp leading edge of a learning curve.
Lead me not into temptation.....I can find it myself!
Posts: 4,553
Threads: 100
Joined: Dec 2008
I made a "Judgement Call " on the amount of interior detail, and decided to permanently attach the "bridge deck". I've started to install the vertical posts that support the outer edge of the bridge deck. Once those are all in, I can begin laying the wood planks on that deck, after I do some soldering.............( more assembly jigs to build )  
We always learn far more from our own mistakes, than we will ever learn from another's advice.
The greatest place to live life, is on the sharp leading edge of a learning curve.
Lead me not into temptation.....I can find it myself!
Posts: 4,553
Threads: 100
Joined: Dec 2008
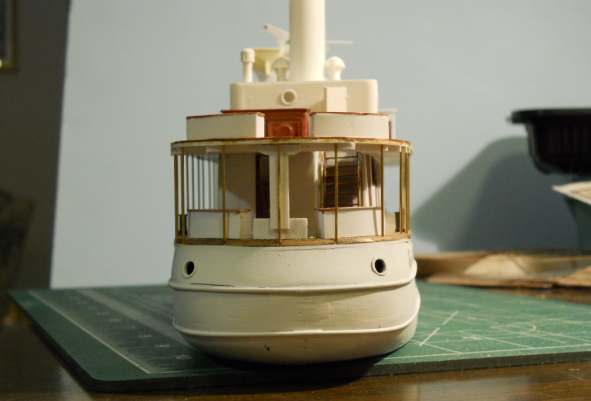
Deck planking is in, on the bridge deck, and stained. I tried something "different", in bonding the wood strips to the styrene deck. For a while now I have been using Siliconized Acrylic Caulk, for attaching details to the modules. A "flexible" adhesive, it is less prone to details breaking off due to shock, in transit to and from shows. I decided to try to thin the caulk with water, so it could be applied to the wood strips more easily. It worked !!, And, the deck is firmly adhered to the styrene !!
-------------------------------------------------------------------------
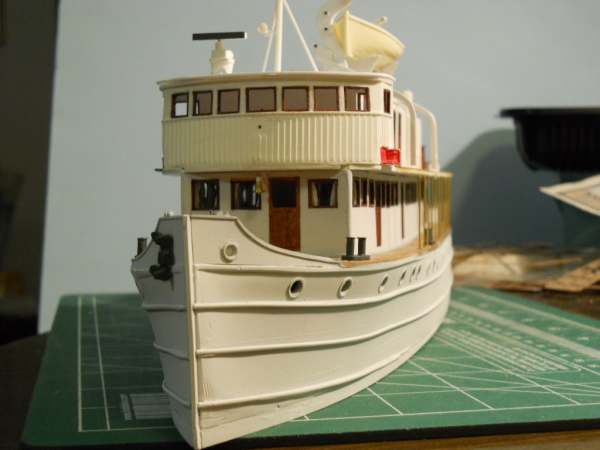
Here, the skylight sill can be seen, fairly close to the proper height above the deck. This shot also shows the vertical posts between the shelter deck, and the bridge deck.
-------------------------------------------------------------------------
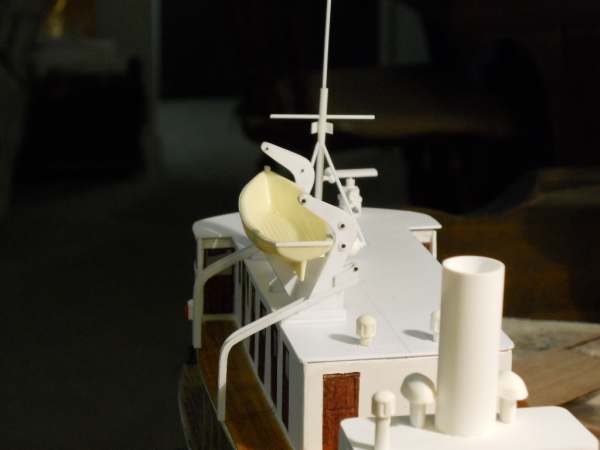
The after bridge deck, and shelter deck.
-------------------------------------------------------------------------
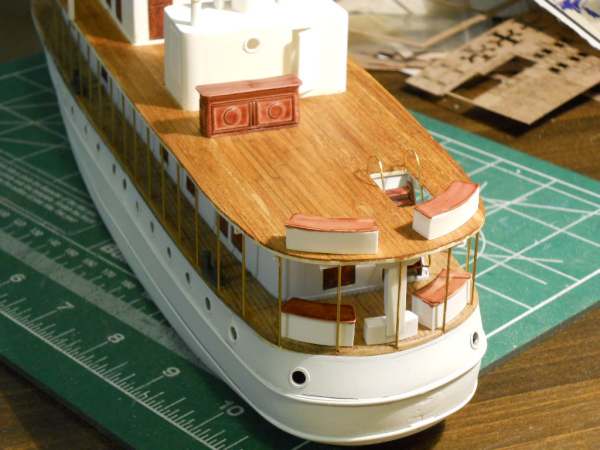
Looking forward at the overhead of the bridge deck cabins, and pilothouse. I'm still comfortable with the use of the gravity davits with that lifeboat......and there's still time before the final decision to keep, or not.
-------------------------------------------------------------------------
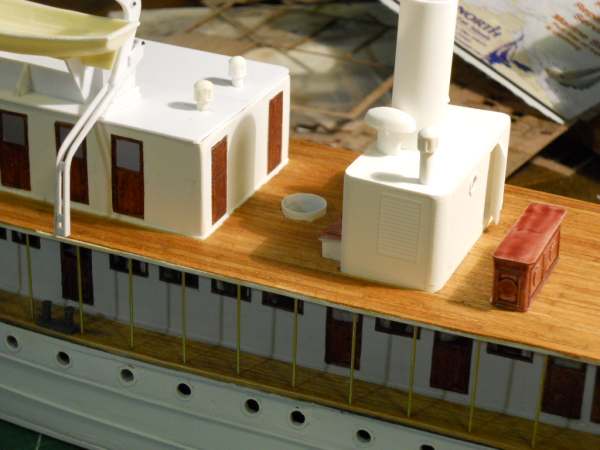
Port bow shot. Even here, the lifeboat isn't "overbearing". Keeping it, will make necessary the adding of a ladder to above the cabins, and railings ( at least some ) on that level, for crew safety when lowering or raising the lifeboat.
-------------------------------------------------------------------------
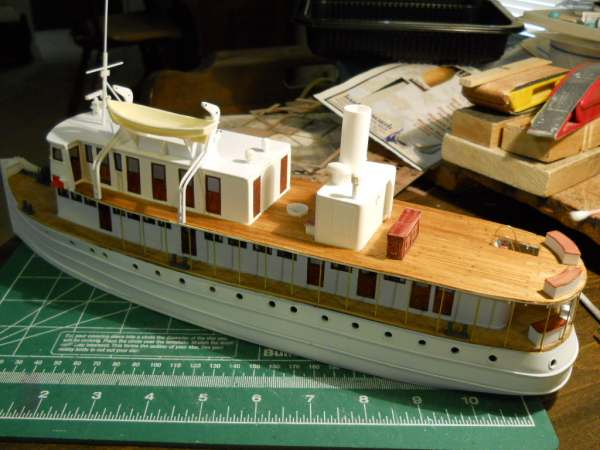
Lastly, a stern shot....you can just make out the beginning few "I" beam supports for the bridge deck, that run thwart-ships. On my computer's monitor screen, this picture comes up almost exactly full size ( 22 scale feet wide ) 8-) 
We always learn far more from our own mistakes, than we will ever learn from another's advice.
The greatest place to live life, is on the sharp leading edge of a learning curve.
Lead me not into temptation.....I can find it myself!
Posts: 5,859
Threads: 175
Joined: Dec 2008
This is really coming together nicely, Pete.  
Wayne
Posts: 1,126
Threads: 85
Joined: Nov 2010
Yes Pete,
it is still interesting to watch the progress in the building this boat.
My suggestion:
On the aft end of the cabins there are two doors. The backboard door is for a small compartement containing fire equipment for the crew, hoses, helmets, suits, breather and other necessaries for fire fighting aboard. This door was marked with the international sign "F", black on white ground with red surroundings.
Just right of this door is on real Diana a small vertical ladder leading to the cabin roof.
The other door on starboard side leads to a "Diana-Size" shower and restroom.
Lutz
Posts: 4,553
Threads: 100
Joined: Dec 2008
Arrrrrgh, I did, completely miss, the last door on the port side aft, on the shelter deck !!  It is just a little too late to attempt to add that one now. :oops:
---------------------------------------------------------------------------------------
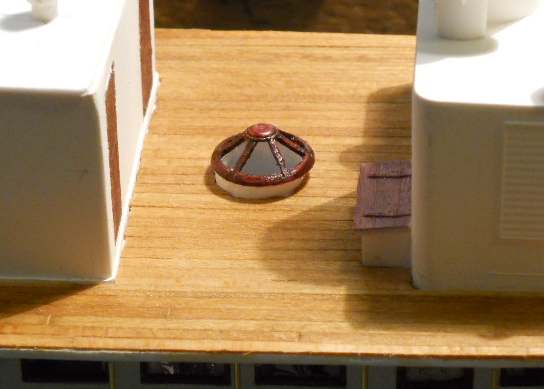
Here's a picture of the skylight , based on the information you were able to provide, I came up with what I hope will be a close representation of the actual skylight.
---------------------------------------------------------------------------------------
The decking, on the Bridge deck, turned out quite nicely, and I'm thinking that if I do use the lifeboat, and davits for it, I may lay in decking from just aft of the "mast", to the aft end of the Bridge deck cabin's overhead, and enclose that area with railings. I can use an external vertical ladder, center-line aft, for access to that level.
The Coastal freighter I built was named "Louis Arthur", for my Dad.
The collier, under construction will be the "Ralph Henry" for his brother.
I will use the name "Letty J." for my Mother, on this vessel.
This quickly became a challenging, interesting, and fun build. There was a lot of "new learning", and the opportunity to try some new techniques which will, no doubt, come in handy for some future project. I am very happy that the pictures of "Diana" got posted. Inspiration, from any source, is a good thing.
 many thanks  
We always learn far more from our own mistakes, than we will ever learn from another's advice.
The greatest place to live life, is on the sharp leading edge of a learning curve.
Lead me not into temptation.....I can find it myself!
Posts: 4,688
Threads: 342
Joined: Jan 2009
Pete,
This is an eye catching boat, just seems a shame that you covered up all that great looking interior work.  
Bruce
Posts: 1,126
Threads: 85
Joined: Nov 2010
Sumpter250 Wrote:Arrrrrgh, I did, completely miss, the last door on the port side aft, on the shelter deck !!  It is just a little too late to attempt to add that one now. :oops: It is just a little too late to attempt to add that one now. :oops:
---------------------------------------------------------------------------------------
[ATTACHMENT NOT FOUND]
Here's a picture of the skylight , based on the information you were able to provide, I came up with what I hope will be a close representation of the actual skylight.
--------------------------------------------------------------------------------------- Exactly that is it 
Think now of an round glass plate as table supported by 4 brass legs. Grouping some (wicker) deck chair around it and placing some glasses and bottles containing "spritual" drinks onto the table. You won't modelling prohibition aera, you really won't?
Posts: 4,553
Threads: 100
Joined: Dec 2008
Schraddel Wrote:"Sumpter250" wrote: "Here's a picture of the skylight , based on the information you were able to provide, I came up with what I hope will be a close representation of the actual skylight."
Exactly that is it 
Think now of an round glass plate as table supported by 4 brass legs. Grouping some (wicker) deck chair around it and placing some glasses and bottles containing "spritual" drinks onto the table. You won't modelling prohibition aera, you really won't?
 I took a gamble that the shipbuilding traditions of Europe, passed relatively unchanged to the American shipbuilders, and that much of what we do here has its roots in the older traditions. The gamble paid off!! 
The table? that will be easy
The bottles? That will be difficult
The glasses? :o  hock:   hock: :o Forgedaboudit
The wicker chairs?  I'll have to think about those - - - - - -  
We always learn far more from our own mistakes, than we will ever learn from another's advice.
The greatest place to live life, is on the sharp leading edge of a learning curve.
Lead me not into temptation.....I can find it myself!
|

 When you're finished ,I have an idea for another model
  --- HMCS Haida --- this "tin can" should be a piece of cake for someone with your skills and talent


![[Image: P1080512-1.jpg]](http://i293.photobucket.com/albums/mm49/cnnutbar48/hmcs%20haida/P1080512-1.jpg)

 When you're finished ,I have an idea for another model
  --- HMCS Haida --- this "tin can" should be a piece of cake for someone with your skills and talent
 ![[Image: P1080512-1.jpg]](http://i293.photobucket.com/albums/mm49/cnnutbar48/hmcs%20haida/P1080512-1.jpg)


 USS Lowry DD-770

 It is just a little too late to attempt to add that one now. :oops:
 many thanks
  I took a gamble that the shipbuilding traditions of Europe, passed relatively unchanged to the American shipbuilders, and that much of what we do here has its roots in the older traditions. The gamble paid off!!
  hock:
hock: 