| Welcome, Guest |
You have to register before you can post on our site.
|
| Forum Statistics |
» Members: 600
» Latest member: YilaAI
» Forum threads: 10,161
» Forum posts: 182,834
Full Statistics
|
| Online Users |
There are currently 2233 online users.
» 0 Member(s) | 2228 Guest(s)
Applebot, Baidu, Bing, Facebook, Google
|
| Latest Threads |
The Hobo Camp Fire Is goi...
Forum: Hobo's Camp
Last Post: sir james
3 hours ago
» Replies: 402
» Views: 74,708
|
2026 Big Blue NASCAR Raci...
Forum: Lower Berth
Last Post: dwight77
4 hours ago
» Replies: 99
» Views: 20,946
|
Trains This Day/Month in ...
Forum: Shutterbug area
Last Post: Charlie B
Yesterday, 11:06 AM
» Replies: 1,286
» Views: 666,287
|
Photo Fun October 2026
Forum: Shutterbug area
Last Post: tompm
Yesterday, 09:46 AM
» Replies: 27
» Views: 1,896
|
Here's the new and improv...
Forum: Stop here and say "Hello"
Last Post: ngauger
Yesterday, 06:42 AM
» Replies: 234
» Views: 96,740
|
Big Blue has inspired som...
Forum: Upper Berth
Last Post: BR60103
10-30-2026, 07:05 PM
» Replies: 183
» Views: 142,607
|
CN Blackwater division
Forum: Layouts
Last Post: TMo
10-30-2026, 04:23 PM
» Replies: 208
» Views: 259,107
|
SPAMMERS!!!!
Forum: Forum Announcements
Last Post: ngauger
10-28-2026, 04:59 AM
» Replies: 17
» Views: 1,422
|
Charlie b's layout
Forum: Layouts
Last Post: TMo
10-27-2026, 03:36 AM
» Replies: 1,339
» Views: 752,850
|
! ! ! ! ! Pennsy Power ! ...
Forum: HO Modeling
Last Post: TMo
10-26-2026, 06:09 PM
» Replies: 76
» Views: 63,673
|
Old Steamers
Forum: HO Modeling
Last Post: Tom P.
10-26-2026, 11:11 AM
» Replies: 113
» Views: 109,691
|
trucks
Forum: Upper Berth
Last Post: jim currie
10-24-2026, 08:37 PM
» Replies: 2
» Views: 290
|
Current Projects
Forum: HO Modeling
Last Post: jim currie
10-24-2026, 02:05 PM
» Replies: 502
» Views: 319,209
|
Rainbows in the Lehigh Va...
Forum: Layouts
Last Post: tompm
10-20-2026, 05:04 PM
» Replies: 739
» Views: 579,758
|
BC Hydro Railway /SRY Cab...
Forum: HO Modeling
Last Post: cnrglen
10-20-2026, 05:00 PM
» Replies: 10
» Views: 874
|
|
|
| Eastern Car Works Passenger Cars |
|
Posted by: nkp_174 - 12-28-2008, 08:29 PM - Forum: HO Modeling
- Replies (2)
|
 |
Has anyone built any ECW passenger cars...in particular, the lightweight passenger cars? Do you have photos you can share?
I'm thinking about some passenger car projects in HO...and was wondering whether to go from scratch or from their kits. Their PS lightweights are based on the 1938 20th Century Limited...which is one of the trains I'd like to build...but I've heard reports that their quality is poor. Being that I don't care for the post-war train (the interior or exterior), I have no interest in the post-war equipment that Walthers will be releasing soon. I want to build one of the Inns, an Island, and a few of the others. Of course, a Dreyfuss J3-a will be pulling the consist. Champs has 1938 lettering on their product list (the scheme was changed in 1939...with the blue strips replaced by aluminum and the center strips thinned).
A major desire on my part is to build the interiors to accurately depict the as-built decor.
There are a few additional cars in my building plan that I will have to build from scratch, a 2600 series coach (NYC/Pullman, 1941), a few sleepers not commercially offered, a Falls series Sleeper-Lounge (Pullman, 1939), and the NKP 80 series modernized coaches. What will be first is dependent upon the quality of the ECW kits. I plan on trying out some new resin on these cars.
|

|
|
| LED's and DCC |
|
Posted by: Howie1632 - 12-28-2008, 04:24 PM - Forum: DCC
- Replies (7)
|
 |
I've got a simple led with a rectifier hooked up to a sidind to indicate when it is powered.It's a blinking LED,but it don't blink while hooked to DCC and a rectifier but it does light up.When hooked to DC it Blinks just fine.What am i missing here¿ Thanks Harold
|
|
|
|
| chat |
|
Posted by: LynnB - 12-28-2008, 12:54 PM - Forum: Lower Berth
- Replies (2)
|
|
Just curious if we're going to get a chat room, we had one on the old old guage forum ( had to click a few links to get to it )?
|
|
|
|
| i have a problem and i am serious |
|
Posted by: stuart_canada - 12-28-2008, 12:43 PM - Forum: HO Modeling
- Replies (12)
|
|
after spending many years thinking my dream locos were the blue box special, shake, rattle and it was good to go. when i wasa kid i could not afford them and only guys i knew who had them were much older than i was ( now hitting 40 next year) i put up with my bachmann pancake motors and the tyco powered units ( boy am i glad the tyco died). when i got back into the hobby after almost 15 years i started getting my blue box units and i was amazed at the details and the smooth running. i put my older bachmanns, model power, life like all on a rip track looking pretty but they never moved. Thenafter my divorce a friend got me 2 Kato sd70macs ( i trade one for a Sd 45 CPR unit) and i never ran them much because they were too big for the layout so i was never impressed with the details and stuff. they just looked nice. now i went out and got a con cor kato mp15 and the kato NW 2 switchers and i now hate my athearn blue box specials they are noisey, they do not run as nice, lack the details and so on.
all i want now is the Kato models, P2k or the ready to run athearn, no more blue box models for me.
i will take an atlas with the kato drive system.
do you think i have a problem is there a support group?
I am the owner of over 30 blue box specials now 2 spectrum units and 3 pure katos, 4 atlas, concors with kato drives.
stuart
renfrew ontario
|
|
|
|
| Utility poles |
|
Posted by: cnw1961 - 12-28-2008, 08:30 AM - Forum: Scratchbuilding and kitbashing - All Scales
- Replies (10)
|
 |
Bored? Looking for new challenges? Make your own utility poles! 
On my last lyout I used plastic poles made by Rix. They looked quite nice, but somehow the plastic poles did not look right. So I decided to do my own wooden poles. First I thought of using the Rix crossarms, but plastic crossarms on a wooden pole? Naw...
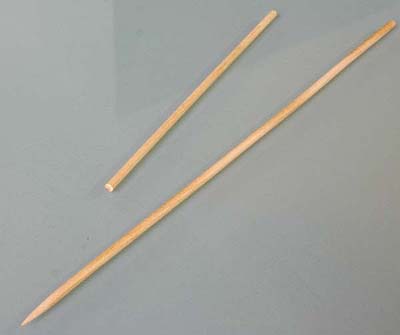
I started by cutting this 1/8" skewer down to a length of 5".
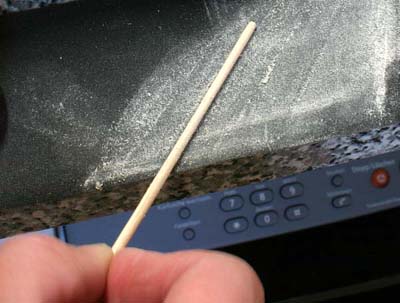
Next I sanded the upper half to make it a bit thinner than the bottom.
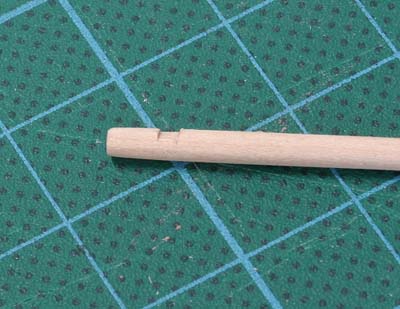
To make it easier to glue the croosarm to the pole, I cut a little groove close to the top of the pole.
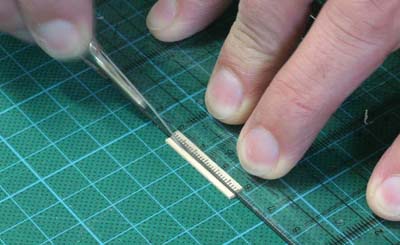
The crossarm is a little piece of .040" stripwood. I cut it to approx. 1 1/4" x 1/16".
Then I glued the crossarm to the pole and stained the utility pole with thinned india ink. The next pic shows the pole with the first insulator already attached. That’s where the fun begins.
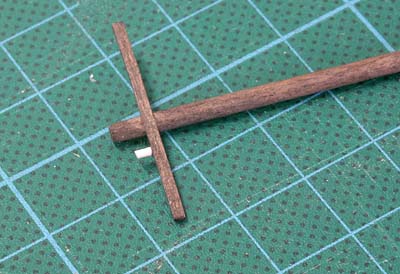
To make the insulators, I used a round .040" styrene rod and cut off little pieces of about .080".
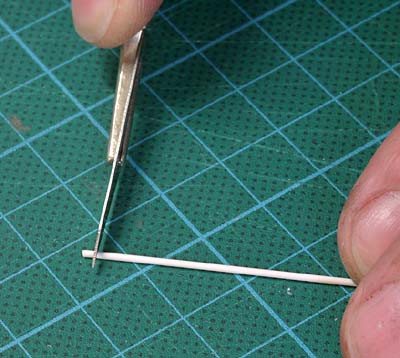
Then, holding a insulator with a pair of tweezers, I dipped one end in super glue and placed the insulator on the crossarm. I tell you, after placing the third insualtor on the crossarm, you’ll start to squint .
For the supports of the crossarm I cut a .030" strip of .013 styrene. I used plastic cement to glue the supports to the pole.
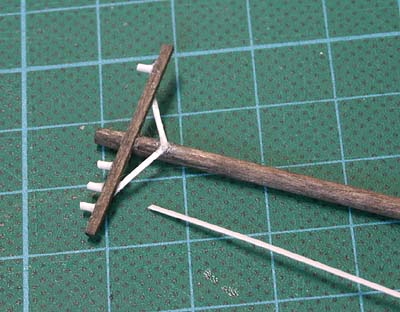
Well, here it is.
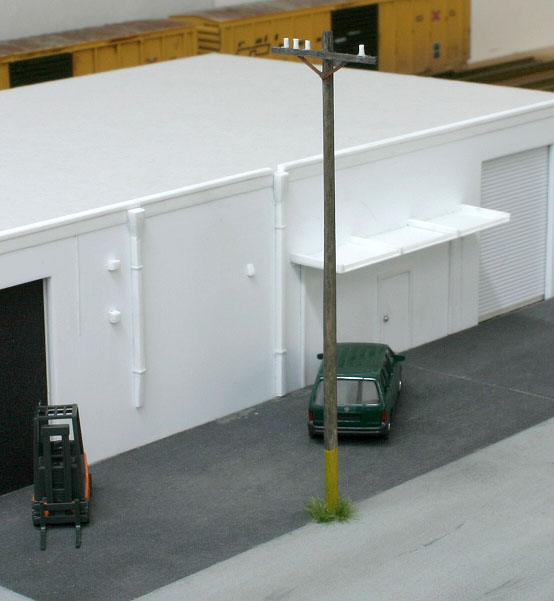
Having seen this, I’ll bet you can think of better ways to waste your time  .
|
|
|
|
|