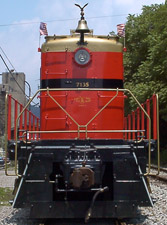
No....I'm begging, on my knees pleading.
We need articles for the up coming Emag issue.
OH...I'm sorry...Did I forget to mention that?
We're bringing back the EMAG!
New Forum...New E-Mag!
Anyway...We need your articles, pictures, How-Too's, railroad history, stories(good for you guys that actually work(ed) on one) product reviews layout tours, railfan hot spots. With lots of pics!
And we need them by April 15th(ish).
Don't worry if you don't think you can write. We'll fix 'em, fluff 'em, spell check 'em for you.
You can e-mail them to me at <!-- e --><a href="mailto:eightyeightfan_99@yahoo.com">eightyeightfan_99@yahoo.com</a><!-- e -->
Please mail text and pictures in seperate e-mails
Title your email:"Text For Emag Article", and "Pics For EMag Article". They may get deleted(and have in the past) if you don't.
When sending pics, use a File Name such as "CNE1" "CNE2"..ect...ect...
When writing the text, use that file name where you'd like the picture to go. (Or, you can just let us take care of the picture placement for you)
Ex: (CNE1)
As you can see in the picture, the Central New England used mostly Baldwin locomotives at the turn of the century.
So..Lets start thinking, typing and getting them articles to me(or Mikey[Ngauger]...Don't know why...He usually sends them to me anyway)
And remember....Everyone gets in...And there will be a link(Ohh) from my Facebook, and Yahoo accounts, so it will be seen by other people.
Edit postReport this postReply with quoteRe: Lionel HO trains
by toptrain on Oct 19th, '09, 16:13
Big Blue Lionel HO trains photo posts to date.
1, 0635, 4-6-2, repaint to PRR. K2 class
2, 0625LT 4-6-2, SP
5, 1 photo of three 4-6-2s. bottom to top.
0625LT SP, 0636LTS SP, 0645LTSW SP
6, 5402, GP7, UP.
8, 5513, GP7, American Flyer.
9, 5516, GP7 B&O GOLD.
10, 0057, Hustler, UP.
12, 0545, center cab, Erie.
13, 0602, three photos
1, two 0602 locos on layout doubleheading.
2, 0602, 0-6-0,PRR B6, fireman's side.
3, 0602, 0-6-0,PRR B6, engineers side.
14, 0809, IC crane MMW.
15, 2042, 40' box car, Linde, LAPX 2042
16, 5-8613, 40' box car, UP.
17, 88400, 40' box car, CP Rail.
18, 0875, 40 flat black with boat load, Seaboard.
21, 42806, 40' flat car red with boat load, Seaboard.
22, 0870, 40' flat red platform car, PRR.
23, 0301, ballast dump car, PRR.
24, 0301 ballast car, by Shaygets.
25, 0602, 0-6-0 switcher, PRR B6.
26, 5-6501, SP GS4 4-8-4 Freedom Train.
28, 0365,Air Force Missle car
29, 0805 Radioactive car
30, 0366 Milk Car
31, 0834 Poultry Dispatch Car
32, 0801200 Seaboard flat with Aeroplane
Now I am no expert on lionel trains. I have just lived thro all of Lionel's attempts to make and sell HO scale trains. I've see alot of them. I have a few of their cars and locomotives. My reason for having them is their use of the English ( John English-HObbyline ) dies to create their first Lionel made locomotives. Mainly the pacific 4-6-2 type. When they made their pacific they slightly changed it. The placed a square cover atop the boiler against the cab. Above this they put a turret cover. The turret cover inclosed the valves and piping that feed steam for auxiliary uses.The square cover was large enough to look like a small belpare firebox top the size used on the PRR K2 locomotives. The Pennsy is one of my main roads. The USRA tender Lionel used also looked like a PRR tender so if the price was right I aquired a PRR K2 pacific.
Here is one of my PRR K2's I got this way. PRR #5730. The tender is a Bachmann tender.
First off thanks to Pete (Sumpter250) for giving me some valuable info to get this project started.
I'm avoiding other work on the layout...I dunno why...I just am.
So, I started work on a Wood Sand Tower based on the prototype used by Canadian Pacific.
The first component I have started on is the Wet Sand Bin.
Sorry, no work in progress shots. I just got going on this tonight on a whim. Tomorrow I might get moving on the building and then on to the tower as the days move on.
The steel rods are from Tortoise Machines. I use a heavier gauge piano wire to throw my turnouts, so these thinner stock ones fit the bill nicely.
I don’t need a gantry crane for my layout, but I needed a break from working on my layout. I wanted to do some modeling, so I decided to build a gantry crane, the obvious choice, isn’t it? . A while ago I saw this pic of an old gantry crane http://www.gingerb.com/CNJ%20Wilkes-Barr...201968.jpg and ever since I wanted to build something like that. For first attempt I wanted to use styrene to build the crane. I started with doing a drawing for the legs of the crane.
Next I glued a printout to a .020" sheet of styrene, cut the sides of the leg out and assembled the leg. It looked like that.
To tell the truth, I did not really enjoy doing this leg and it did not look good enough. And besides, after working a lot with styrene for the structures of my layout, this was not the new challenge I was after. So I decided to try to build the crane from brass. I have only done some detail parts from brass so far, not a whole structure. So this would be a completely new experience.
I just had to go to the local hardware store for a couple of bolts, and while there my wife requested I pick up some 100 watt light bulbs.
I found the prominent display for the 8 bulb value pack for only $6.99. Being I'm cheap Chuck, I think, this is a rather expensive pack of bulbs, perhaps the store prices are just too high. Well, I turn around and at the same level on a shelf are the exact bulbs in the expensive 4 pack for $1.99.
You gotta watch these merchandisers.
Charlie
Is there a way to straighten the "mesh" they provide with there fencing materials? The pieces i have are all wrinkled and it makes it dang near impossible to cut straight and fasten to the fence
Anyone have any suggestions? I would like to continue using this stuff if i can since i have a bunch of it and money is tight right now.... I just cannot for the life of me cut a straight piece, and when i do get a semi-straight piece, when i go to glue it, it does not lay flat and then i have to use a ton of white glue to hold it in place, and then when i paint it, it looks like crap cuz you can see where the excess glue was used, it covers the mesh in some areas and looks terrible Its really frustrating
Any help or suggestions are appreciated, thanks in advance
I am far enough along that I thought I would start posting progress pictures.
This is in my garage that I have to share with my wife's car and yard equipment. The layout is 24x2 ft along the back and 20x2 ft down the wall on the left and the island, and the end of the island is 4x4 ft. I didn't realize how big it would be until now. Also, I had a choice of finishing the walls this year or building the layout, bet you can't tell what won
I don't know why the first pic is so blurry :oops:
As you can tell, construction is ongoing, so don't mind the mess.





![[Image: DSC02914.jpg]](http://i229.photobucket.com/albums/ee118/tetters73/DSC02914.jpg)
![[Image: DSC02915.jpg]](http://i229.photobucket.com/albums/ee118/tetters73/DSC02915.jpg)

![[Image: 100_1734.jpg]](http://i21.photobucket.com/albums/b254/lesterperry/100_1734.jpg)

 . A while ago I saw this pic of an old gantry crane
 ![[Image: crane_leg.jpg]](http://www.cnw.mattheydesign.de/crane_leg.jpg)
![[Image: crane1.jpg]](http://www.cnw.mattheydesign.de/crane1.jpg)